Bill Hanlon
Member
With MUCH help from Bill Brubaker (he did MOST of the work) I now have a new seat in my '52 GMC.
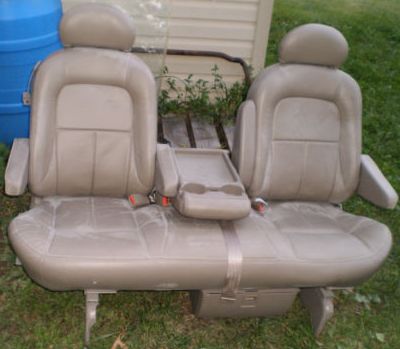
This seat is from a 2003 GMC Safari van (Chevy Astro van) with a leather package and removable 2nd
and 3rd row seating.
Here is what the seat looks like when popped out of the van.
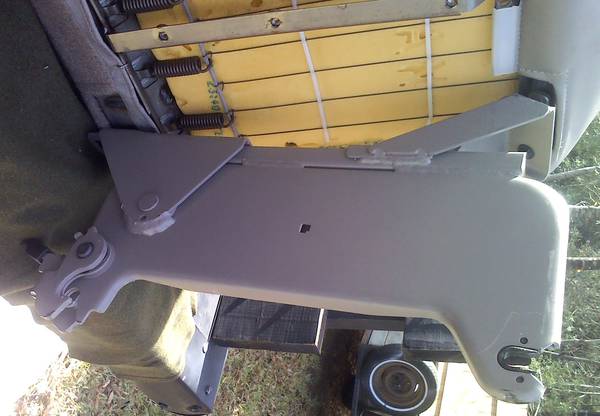
The seat has two of these brackets on the bottom to allow easy removal from and insertion to the Safari
van. Not all vans have this quick release seating.
We removed each bracket (they are identical, not mirror image of each other) by taking out two small
bolts at the front and one large bolt at the rear of each bracket.
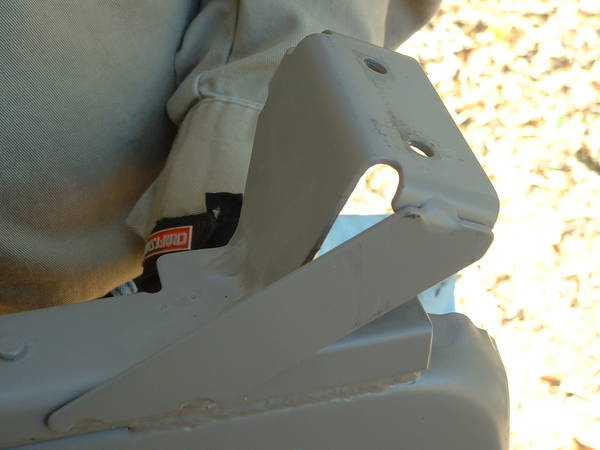
Here is a detail shot of the front attach point of the bracket.
We cut the front attach point off of the bracket to use with our new seat mount.
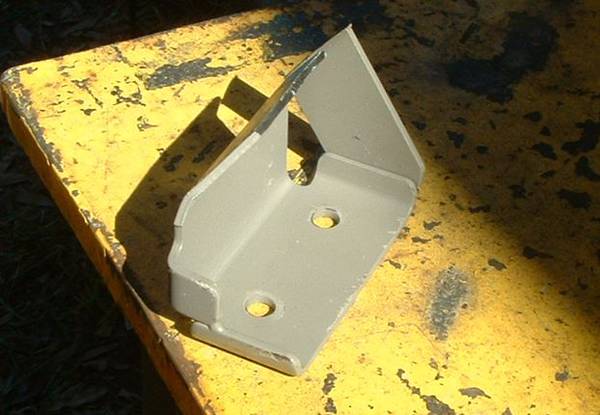
We bent and cut the front attach point from the bracket to line up with the seat and our new 1" x 1" tubing
that runs between the stock seat slides about 1" behind the original attach bolts.
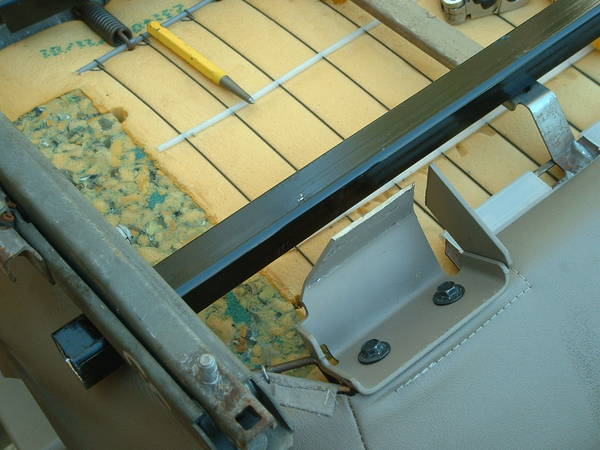
Welded it together and put "tabs" on the bottom of the front square tubing 47.5" center to center of
the original slide mounting bolts.
Front is done.
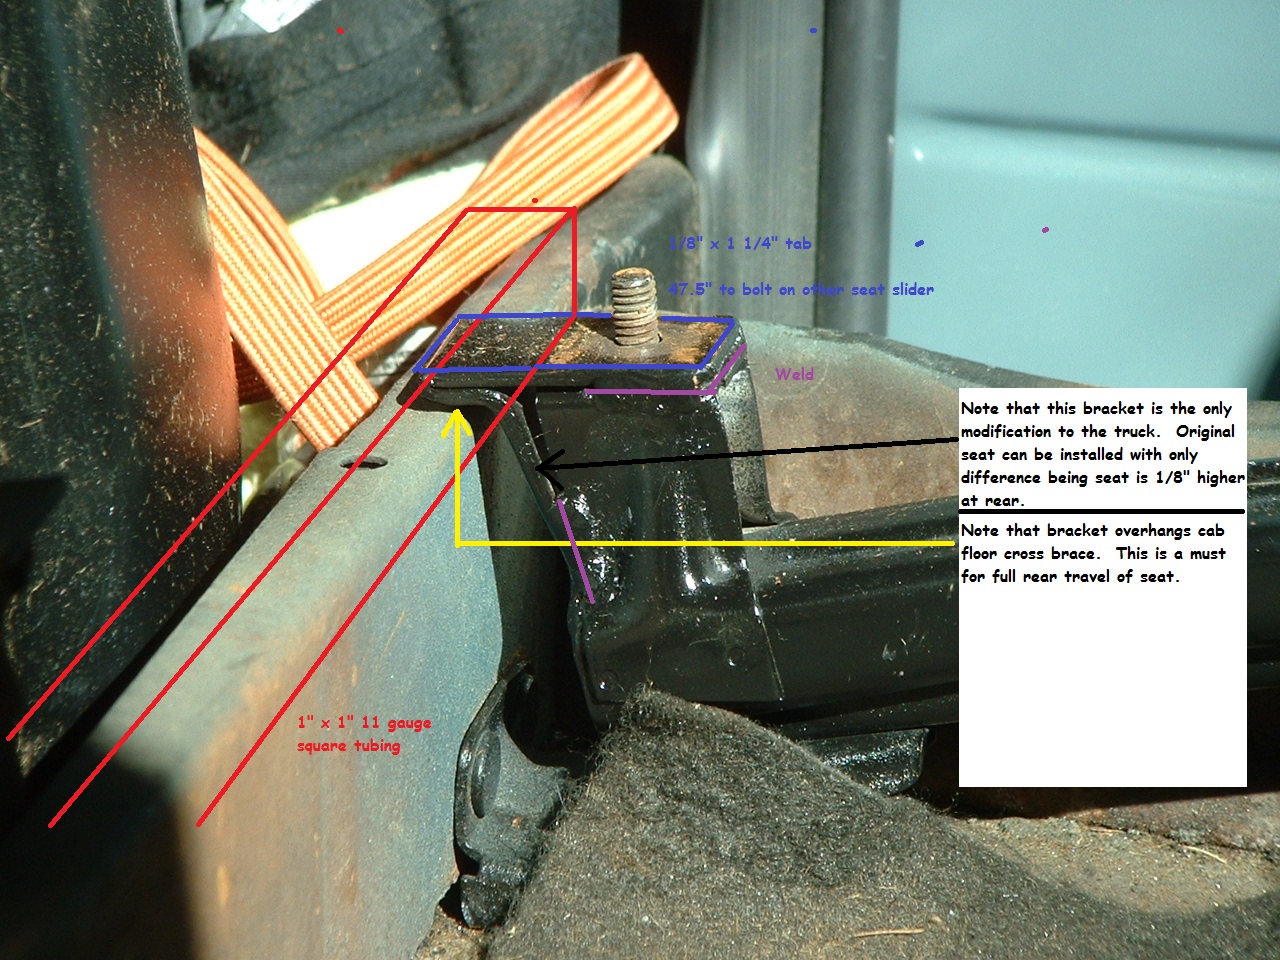
At the rear of the slides we made a "porch" for the 1" x 1" tubing to sit on. This was necessary to get
maximum rear adjustment from the new seat. I'm 6' 5" and need all the legroom an old GMC truck
can spare. This porch is welded to the rear of the slide and is the only permanent modification to the
truck in this whole job. The original seat will drop back in place if desired. The rear of the seat will be
1/8" higher than stock, otherwise it is the same as original.
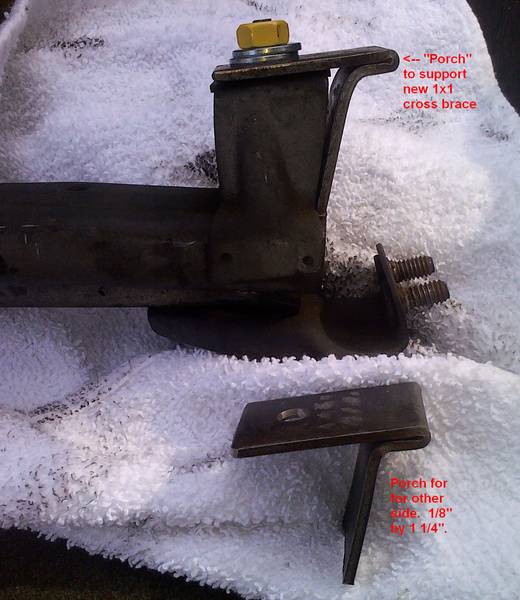
Detail of the porch and attaching hardware.
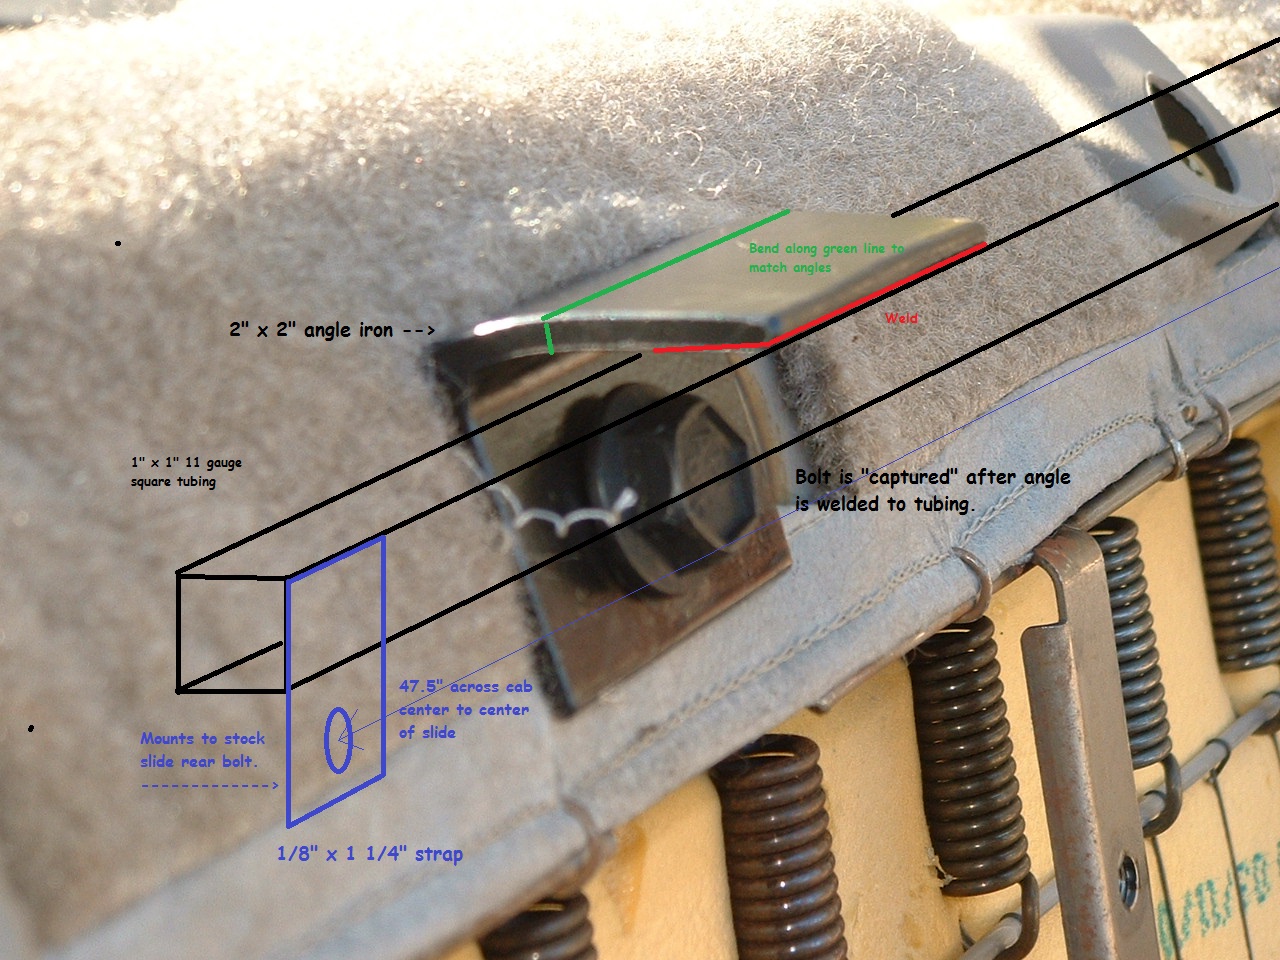
Detail of attachment of rear tubing to seat. Note that the attach bolt is captive. MAKE
SURE IT IS THROUGH THE HOLE IN THE ANGLE IRON BEFORE YOU WELD THE ANGLE
IRON TO THE TUBE.
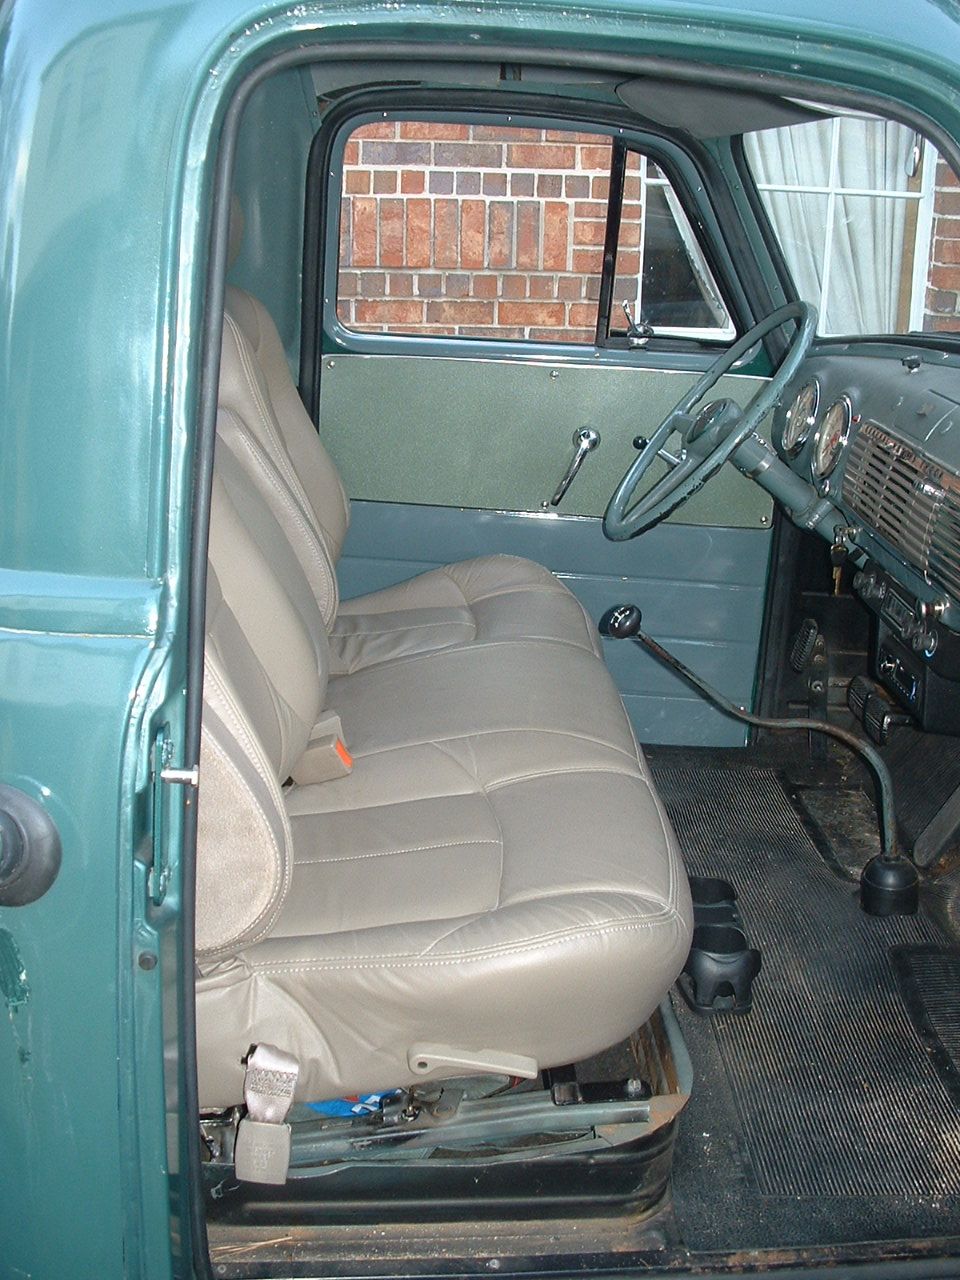
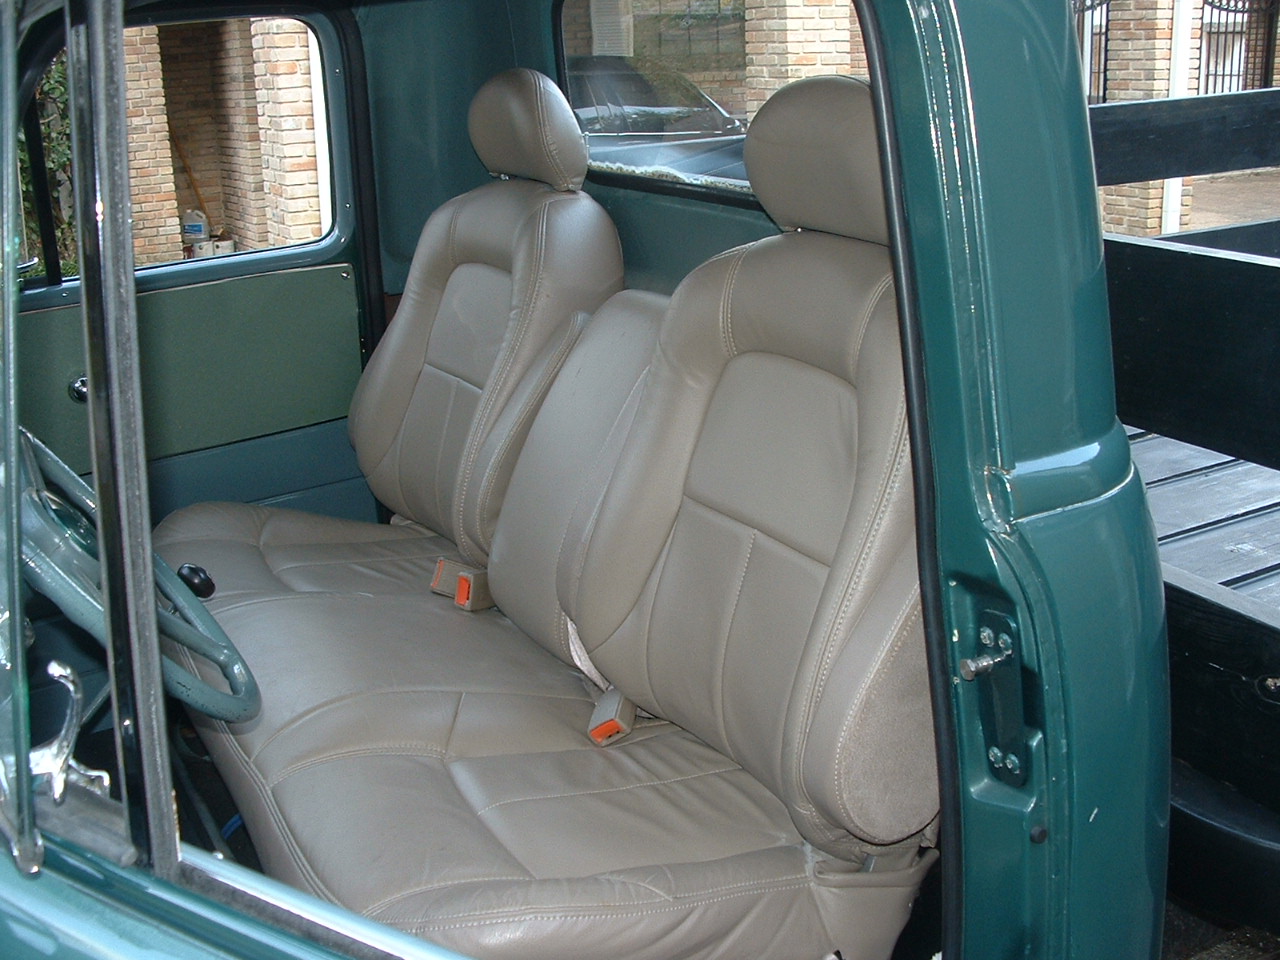
And the results ....
Again, many thanks to Bill Brubaker for his help in welding and fab skills.
And to his wife Susan for putting up with both of us.
This seat is from a 2003 GMC Safari van (Chevy Astro van) with a leather package and removable 2nd
and 3rd row seating.
Here is what the seat looks like when popped out of the van.
The seat has two of these brackets on the bottom to allow easy removal from and insertion to the Safari
van. Not all vans have this quick release seating.
We removed each bracket (they are identical, not mirror image of each other) by taking out two small
bolts at the front and one large bolt at the rear of each bracket.
Here is a detail shot of the front attach point of the bracket.
We cut the front attach point off of the bracket to use with our new seat mount.
We bent and cut the front attach point from the bracket to line up with the seat and our new 1" x 1" tubing
that runs between the stock seat slides about 1" behind the original attach bolts.
Welded it together and put "tabs" on the bottom of the front square tubing 47.5" center to center of
the original slide mounting bolts.
Front is done.
At the rear of the slides we made a "porch" for the 1" x 1" tubing to sit on. This was necessary to get
maximum rear adjustment from the new seat. I'm 6' 5" and need all the legroom an old GMC truck
can spare. This porch is welded to the rear of the slide and is the only permanent modification to the
truck in this whole job. The original seat will drop back in place if desired. The rear of the seat will be
1/8" higher than stock, otherwise it is the same as original.
Detail of the porch and attaching hardware.
Detail of attachment of rear tubing to seat. Note that the attach bolt is captive. MAKE
SURE IT IS THROUGH THE HOLE IN THE ANGLE IRON BEFORE YOU WELD THE ANGLE
IRON TO THE TUBE.
And the results ....
Again, many thanks to Bill Brubaker for his help in welding and fab skills.
And to his wife Susan for putting up with both of us.
Last edited:
")