49 GMC Progress Report

Discussion in '1947-1954' started by e015475, Jun 20, 2015.

  1. e015475

    e015475 Member

    Joined:
    Mar 13, 2014
    Messages:
    240
    Location:
    Show Low AZ
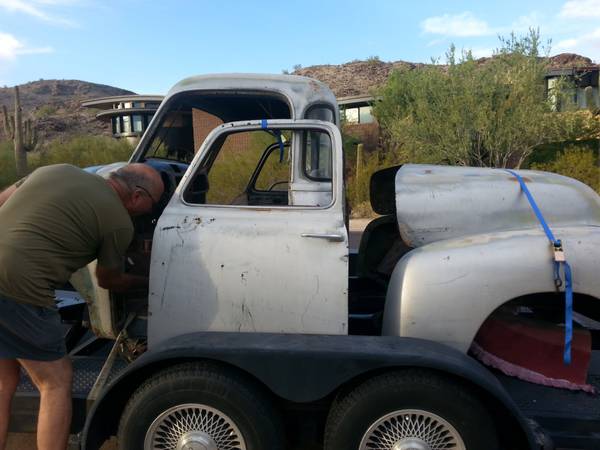
    If I didn't have a bed, how would I haul my beer cooler and lawn chairs to the car shows?

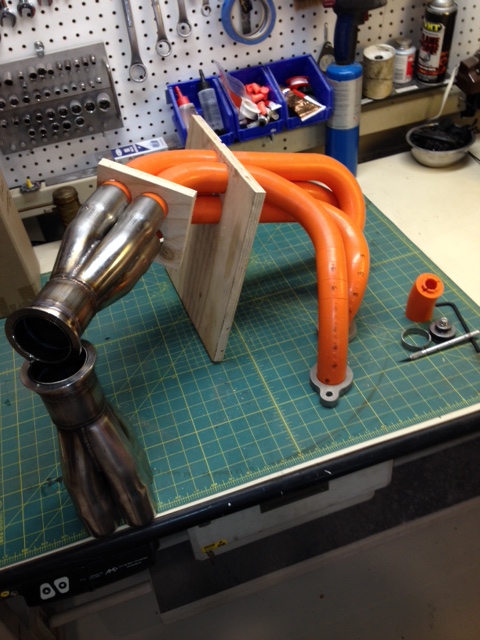
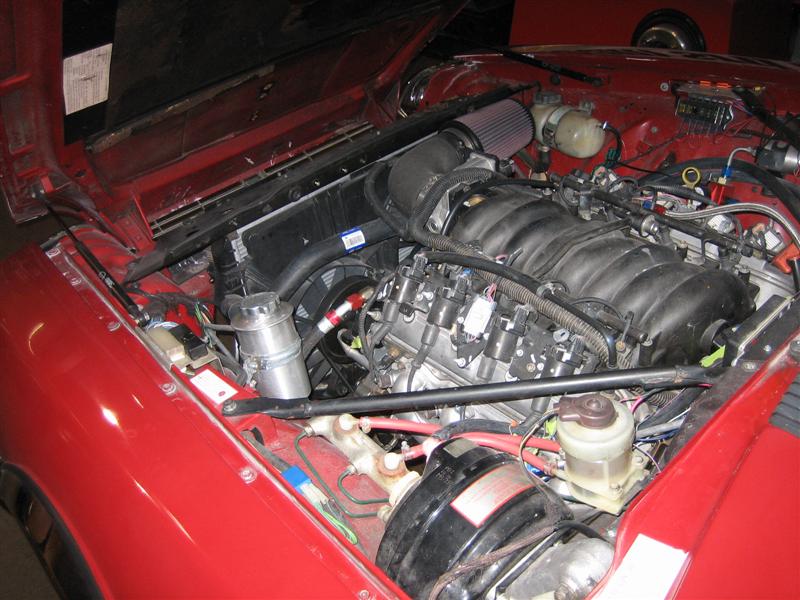
    The engine is from a 2004 Trailblazer SUV, which has a really ugly intake (just remember, opinions are like bellybuttons - everybody's got one) so I swapped the intake out for a Vette's.

    Also, from an aesthetic point of view, I don't like the 90 degree rubber intakes either, and what I prefer is a straight filter coming right off the MAF, so moving the engine back makes for a better look, iMHO

    I put one of these motors in a Jag a couple of years ago, and when I went to have it tuned, the airflow disruption from the elbow caused some difficulties in getting a clean MAF signal. I may even leave the MAF off and tune it speed density. Here's the Jag with the air inlet turn I'd like to avoid
    [​IMG]
     
    Last edited: Nov 18, 2015
  2. e015475

    e015475 Member

    Joined:
    Mar 13, 2014
    Messages:
    240
    Location:
    Show Low AZ
    The rest of the accessories are off a 2002 Suburban. I've done drive by wire - like the Jag- but wanted to get back to a cable driven throttle body and cruise control. I wanted to keep the original look of the stock gas pedal and it seemed to me that the easiest way to do that was cable

    And last but not least, I'm cheap. Truck accessories are inexpensive compared to converting the accessory drive the the F-body or Corvette configuration
     
  3. Zig

    Zig Member

    Joined:
    Oct 14, 2006
    Messages:
    4,860
    Location:
    Pittsburg KS
    Cargo netting and bungee cords? :rolleyes:
     
  4. e015475

    e015475 Member

    Joined:
    Mar 13, 2014
    Messages:
    240
    Location:
    Show Low AZ
    A progress update on the '49 GMC -

    Suspension is under the front and rear - Jag on bags - this is about the final ride height

    [​IMG]

    Cut outs for the mini tubs on the Mar-k bed sides completed. Made tubs from some trailer fenders.

    [​IMG]

    Some work in process of the Jag IRS and rear airbags-

    [​IMG]

    Got the seat done - didn't really like the results - pleats are not very full and the edges rub against the doors - they didn't before it was upholstered

    [​IMG]

    The grill surround is done and mounted-

    [​IMG]

    Phil
     
    Last edited: Nov 18, 2015
  5. 50 Chevy LS3

    50 Chevy LS3 Member

    Joined:
    Jan 14, 2013
    Messages:
    951
    Location:
    Indiana
    Thanks for the update. Yours is one I like to follow.
    Did you move your brake master cyl. to the firewall?
    What headers are you using?
    Looking real good.

    Steve.
     
  6. Guest5979

    Guest5979 Guest

    Joined:
    Feb 18, 2007
    Messages:
    821
    Where's the pics just see img in a box
     
  7. e015475

    e015475 Member

    Joined:
    Mar 13, 2014
    Messages:
    240
    Location:
    Show Low AZ
    50 LS3 - the master cylinder is still under the floorboards, but toying with the idea of the hydroboost unit -would like to keep the firewall as clean as possible. More to come on this. Weather is nice enough now in Phoenix to start trolling the junk yards for Astrovans

    I had some shorty headers for a last-gen Camaro and they looked like they would work, but the brake pedal hit them, so back to the drawing board (they're new ceramic coated Pacesetters if anyone's interested). Tried Camaro long-tubes and GTO long tubes - n0 love. Corvette center dumps - ditto. Trail blazer cast exhaust (not SS) - NFG

    I bought some 304SS flanges and some ebay merge collectors and am going to try building a set from stainless. Here's the plastic mock-up on the bench- plan was to go out the fender well-

    [​IMG]

    LaTroca-

    The images disappeared when they changed the format - will edit the post tomorrow and see if I can make them come back
     
  8. 50 Chevy LS3

    50 Chevy LS3 Member

    Joined:
    Jan 14, 2013
    Messages:
    951
    Location:
    Indiana
    I'm curious, where did the long tubes conflict? I wonder if a guy could heat and bend the brake arm to the left, and move the hole through the floor to match, things would clear? What do you think?

    I have a thread about headers now, but, no real answers. I don't have a TIG welder, so, I cannot easily make my own custom set.
    I would possibly be interested in your shortys, if you think the brake bending method would wotk.
    I'm thinking, like you, it would be better to keep the firewall clean. I spent today welding up unneeded holes. I used elevator bolts, welded inside to replace those ugly mat fasteners.

    Steve.
     
  9. Guest5979

    Guest5979 Guest

    Joined:
    Feb 18, 2007
    Messages:
    821
    Dang Phil body work looks perfect do you have a color in mind yet?
    I like the seat what did it come out of.
    Robert
     
  10. e015475

    e015475 Member

    Joined:
    Mar 13, 2014
    Messages:
    240
    Location:
    Show Low AZ
    Robert - no color in mind yet but spending a lot of time agonizing over what color I should paint it. It was originally Brewster green (dark green) with apple green interior and pin stripes. Had a couple of the 49 GMC colors mixed up to spray out samples, but can't say I was crazy about any of them. The Chevrolets had more options and I think the GMC was more of a working truck and a little bland. I like the silver blues and greens of the mid 60s Chevys and so does my wife - we'll see. Seat is out of a late 80s GM truck.

    LS3 - My engine sits back in the chassis a couple more inches than usual so I should have had a good shot at clearing the frame rails, but it didn't, but I don't remember if it was the GTO or Camaro headers. The ones that would clear the frame rails had the collector angled such that it hit the frame or the booster, I don't remember which.

    There's a guy posting on one of the boards that's using the LS headers from Art Morrison and they looked like they swept forward and were nice and tight to the block. IIRC he had stock pedals installed too.

    Another option is the Trailblazer SS cast manifolds, I'm told. Makes me wonder if the cast manifolds would work, would shorty headers or long tubes for a TBSS would also work.

    Going to pull the driver's side fender and start working on my headers/steering in the next week or two. Will dig out those Pacesetter Camaro shortys, bolt them up and take some pictures so you can see what they look like and what might be required to get the pedal out of the way
     
  11. 52wasp

    52wasp Member

    Joined:
    Jul 21, 2006
    Messages:
    672
    Location:
    Wilton, New Hampshire
    E0,
    While trolling boneyards for Astro/Safari vans, if the telescoping steering shaft is still present (it's inside a thin rubber tube- looks like inner tube), it may be worth it to grab that as well. It has a small u-joint at each end, handy if you need to get around obstacles like exhaust plumbing.
     
  12. Zig

    Zig Member

    Joined:
    Oct 14, 2006
    Messages:
    4,860
    Location:
    Pittsburg KS
    Is it just me, or did the photos on here to to little boxes with a little broken sign in them? You know how I love my pictures...
    It's just this thread that has that going on.
     
  13. 50 Chevy LS3

    50 Chevy LS3 Member

    Joined:
    Jan 14, 2013
    Messages:
    951
    Location:
    Indiana
    It's not just you, Zig...
    I could not get any pics. until I signed in. Sometimes they are there, sometimes not.

    Steve.
     
  14. e015475

    e015475 Member

    Joined:
    Mar 13, 2014
    Messages:
    240
    Location:
    Show Low AZ
    My avatar disappeared.

    Photos come and go.

    Tried every possible way of reloading them, then logging off and checking to see if they show - no love

    Thought maybe it was the corporate network server I normally use, so I tried it on my wife's computer - didn't make any difference

    Seriously thinking about joining Nate's camp. I don't have this problem on the HAMB or on the 67-72 board. Thinking about making a build thread on the 67-72chevytrucks board.

    Sorry, I tried everything I could think of

    Phil
     
  15. 50 Chevy LS3

    50 Chevy LS3 Member

    Joined:
    Jan 14, 2013
    Messages:
    951
    Location:
    Indiana
    Phil, I'm getting everything except your avatar, now.
    I noticed your photos show up across the top of the screen, in "new media". The pics. I've loaded have never appeared there. Don't really understand that.
    If you go somewhere else, I would like to know because I want to follow along on this build.
    I'm over on 67-72 also, but, hardly ever post, and don't have a build thread there. Lots of rules over there, and plenty of know-it-all attitude.
    All the big forums seem to be that way, see Lakeroadster's 7 page bashing over on the Garage Journal. Pretty sad...

    Steve.
     
  16. Nick

    Nick Administrator Staff Member

    Joined:
    Jan 1, 2000
    Messages:
    68
    Location:
    Kansas City, Missouri
    There are two different problems in play here. One was an oversight on my part--although the images transferred over correctly (and could be viewed by browsing the Media section of the site), any posts that had a direct link to an image that's hosted here (inserted in the post by using the picture's address) ended up having a broken image. This should be fixed now. In some cases the images may have continued to appear, probably because our browsers already had the images stored in their temporary cache from before, and just used it from there. That made the problem kind of hidden for a while. Images hosted somewhere else and added to a post here were unaffected.

    Phil, what's going on with your images not appearing when you log out is related to a permission setting. When you make an album, you can choose who you want to be able to see your pictures, which also carries over to everywhere the pictures in the album are used (such as in posts) and can be changed at any time by using the "Change Permissions" link under the Album Permissions section on your album page: https://talk.classicparts.com/media/albums/1949-gmc.851/

    change_permissions.png

    It's currently set so only members (that is, anyone logged in) can view the album. If you set that to Everyone, it should fix it.
     
  17. Zig

    Zig Member

    Joined:
    Oct 14, 2006
    Messages:
    4,860
    Location:
    Pittsburg KS
    I love it! Pictures ARE back! I like the "click to expand" option too!
    Thanks, Nick!
     
    Nick likes this.
  18. 52wasp

    52wasp Member

    Joined:
    Jul 21, 2006
    Messages:
    672
    Location:
    Wilton, New Hampshire
    Now that is seems we have pictures back (Thanks again tech guys), lets get back to manifolds.

    Back a month or 3 ago, while I was working on Penny at the shop, my brother painted up a set of stock '70 GTO cast exhaust manifolds (with some ceramic-rich high-temp stuff). I just happened to have an exhaust manifold handy from Penny's 5.3. We compared them, both for port size, and "aerodynamics". The ports in the LS manifold (for a 325 CI mill) were much larger than the GTO 400 CI manifold, and the LS piece was shaped more like a header, as compared to the GTO piece, which had sharp bends and a center dump. I think GM did OK with the LS manifolds (how they tied in to the cats on my G8 6.0 is a different story). My G8 is the first vehicle I've ever put headers on, and I was shocked at how much louder they are. Can't argue with the ~40 extra ponies though.

    I don't think a shorty-header will gain anything over a stock piece, but if you DO find a long-tube that fits we'll need to know where from!
     
  19. 50 Chevy LS3

    50 Chevy LS3 Member

    Joined:
    Jan 14, 2013
    Messages:
    951
    Location:
    Indiana
    Phil, I noticed your trailer fender, converted, tubs look good, and are what I will probably use, also.
    I've noticed, everybody seems to weld them in, on the bed side, rather than the fender side. I planned on welding the fender side, out of sight, and then use a seam sealer on the bed side. Your thoughts?
    Also, how do you plan the attachment to the bed floor? I would like to make a somewhat "OEM" looking flange, but, still trying to figure that out.

    Steve.
     
  20. e015475

    e015475 Member

    Joined:
    Mar 13, 2014
    Messages:
    240
    Location:
    Show Low AZ
    Steve -

    The tubs are just as you said, a trailer fender split down the middle. Believe they will cover up to a 28" diameter tire. I tig'd the skirt to the trailer fender and it produced a fair amount of distortion. I had to hammer the weld bead a bit to relieve the stress and get the skirt to lie flat and not oil-can

    To mount it to the bed side, I bent up a piece of sheet metal to 90 deg with a 1.5" leg on each side, about 3' long. I have access to some stretch/shrink dies (harbor freight on a stand with a foot pedal) so I'll shrink one side so it fits the outer radius of the tub. The 90 degree piece will mount to the fender side of the bed and the tire side of the tub. I'll likely wait to mount it to the bedside to when I take it back to the paint shop - they have a spot welder which will produce minimal distortion. (It will be cleco'd together when it goes off to the paint shop)

    For where the tub meets the bed wood, I'll use the same 90 degree doubler to create a flange, but won't be able to match the contour of the tub by shrinking it, so I'll have to weld it up out of sheet metal pieces cut/bent to the lip radius. I'll mount the tubs to the bed wood with carriage bolts and cover all my mistakes with seam sealer

    Phil

    PS - found the Camaro shorty headers in the storage room and drug them home and should be able to take a few photos with them installed on the truck in the next couple of days

    52Wasp - read the Hot Rod article - very interesting. The bottom line for me is that the truck intake is too ugly to live with - in any of its incarnations. If you want pretty and performance - you have to pay! I've bought LS1 intakes for between $25 and $150 that solves the looks problem, but I'm reluctant to spend another $300-500 for a little more torque for an aftermarket intake in a truck that's going to have issues getting it to the ground anyway. Too cheap I guess.
     

Share This Page