49 GMC Progress Report

Discussion in '1947-1954' started by e015475, Jun 20, 2015.

  1. e015475

    e015475 Member

    Joined:
    Mar 13, 2014
    Messages:
    240
    Location:
    Show Low AZ
    Thanks

    Nope, I've sworn off painting anything at home anymore. Too much aggravation from my neighbors. Still finding overspray in my shop from jobs I did ten years ago too. Will do primer out in the driveway and a clear coast once in a while but no more inside painting

    Paint is Matrix base and clear Supposedly the same paint chemistry and chemist as PPG
     
  2. e015475

    e015475 Member

    Joined:
    Mar 13, 2014
    Messages:
    240
    Location:
    Show Low AZ
    More progress. Removed the bed and slid the cab back to paint the firewall
    [​IMG]

    Here it is with the final clear coat. The new Iwata gun lays down the paint with no visible orange peel. All I'll have to do is sand a few dust nibs and polish
    [​IMG]
    The inner fenders will be shop painted too. These are the repo parts modified to clear the headers I made
    [​IMG]
    These were clear coated last night (this is just the basecoat) and we'll turn them over today and paint the other side. Hopefully will get the undersides of the front fenders done and the hood inside done today. Aiming to get the shop painting done so it is ready to reassemble and go to the booth in the next couple of weeks

    Phil
     
  3. 52wasp

    52wasp Member

    Joined:
    Jul 21, 2006
    Messages:
    672
    Location:
    Wilton, New Hampshire
    Phil, you have been scaring the heck out of me... it looks like you have GIANT bugs in the paint... but I realized you had the SAME bugs in every picture. So it's just stuff on the camera lens! (wow, do I feel better already!)
     
  4. e015475

    e015475 Member

    Joined:
    Mar 13, 2014
    Messages:
    240
    Location:
    Show Low AZ
    I spend all my money on booze and hotrods so my cell phones come from the ones my kids don't want anymore. My good iPhone had to be turned in when I retired. Someone on another forum called those things "artifacts", which I think is what you call them when you don't know what they are! I"ll post some really good photos when the paints done
     
  5. 50 Chevy LS3

    50 Chevy LS3 Member

    Joined:
    Jan 14, 2013
    Messages:
    951
    Location:
    Indiana
    I'm glad I live 10 miles from anywhere. In the middle of farm country. I could not live with a homeowners agreement, or contract. The very nature of my business wouldn't allow it, but, even if I worked in town, I would probably have trouble.

    Anyway... Your project is one of the coolest I've followed. Should be in a magazine. Are you a Goodguys, member, Phil?
    The magazine they publish is worth the membership dues.

    Steve.
     
  6. e015475

    e015475 Member

    Joined:
    Mar 13, 2014
    Messages:
    240
    Location:
    Show Low AZ
    Steve - Thanks for the compliment. No magazine aspirations, and I go to a lot of the Goodguy shows in Scottsdale and I really should join. I think I'll follow your recommendation.

    I built my house about twenty five years ago, and what used to be out in the sticks is now pretty much in town. Once my wife stops working we can move a little further out of town, but I do like homeowner's associations. They are not for everybody, but I need protection from people like me - I need to be kept in line or pretty soon I'll have junk cars parked in the front yard. I look at it as sort of a necessary evil. There's a few car guys in the neighborhood but not many 'hands-on' types that are sympathetic and the place has some pretty tough CC&R but I can work around most of them. Technically I'm not supposed to be doing any mechanical work on cars, but I keep the shop doors closed and the amount of junk laying around to a minimum. I'm not supposed to have any more than three garage doors either (three singles or a double and an single) so to put a garage size door on my shop, I had to make a set of 8' high French doors into bifolds for the shop. It is the same size as a garage door. It works like a garage door to drive into the shop. But it isn't really a garage door. See what I mean? To be honest I enjoy bending some of their silly rules (and people on association boards are generally a**holes and its tempting to jerk them around a little), but a temporary paint booth would be tempting fate.

    Little more progress on the '49. Painted the inside of the fenders and the other side of the inner fenders and color sanded then cut and buffed them. Will ,be able to put the fenders on the truck next week - one step closer to getting in the paint booth. Took this picture outside hoping to catch the true color. It isn't so great for color from my phone. Wyatt gave me the drill on how to color sand, cut with rubbing compound and then polish. Very gratifying to bring finish up to the final level.


    [​IMG]

    Enjoying learning new things at Wyatt's shop. Provided some labor (my natural eye to hand coordination isn't anything to write home about) to help make a deck lid for a MG Arnolt in his shop - the deck lid is a little unwieldy for one person to run thru the English wheel. That's me looking perplexed on the right. Took a good eight hours and two annealings to get the crowns in the panel correct. Amazing how much touch labor goes into metal forming.
    [​IMG]

    Here's the final result almost ready to trim then skin the deck lid frames (its about six inches oversize in this pic)- you can still see some of the wheel marks in this foto but some final wheeling at low pressure will produce a mirror-like finish in the aluminum.

    [​IMG]

    Wanting to make some aluminum door panels to replace the cardboard ones on the '49 GMC and would like to get them done before paint so if I mark or scratch the door fitting them its no bid deal. I'd like to use a bead roller to add some detail to the door panels, so I picked up a HF winch motor a couple of weeks ago and mounted it to my bead roller so i can do this at home. Wanting to make a nice filler panel for the front bumper too. Here's what I came up with. Will post pics of the panels as soon as I can make something presentable-

    [​IMG]
    There's a thread on the Garage Journal with more details if anybody's interested.

    Another HF Motorized Bead Roller - The Garage Journal Board

    Best regards to everyone

    Phil
     
  7. 52wasp

    52wasp Member

    Joined:
    Jul 21, 2006
    Messages:
    672
    Location:
    Wilton, New Hampshire
    Phil,
    Excellent progress! I'm falling behind of late...
     
  8. e015475

    e015475 Member

    Joined:
    Mar 13, 2014
    Messages:
    240
    Location:
    Show Low AZ
    A bit of progress to report. Finished the cut and buff of the inner fenders and assembled them to the fenders and installed them on the truck- Waiting for my SEM bolts to arrive to put it all together

    [​IMG]

    There's some pretty subtle modifications to the inner fender wells to accommodate the headers- Should have at least 1" clearance to the headers. Was made in the same contour as the other details on the sheet metal.

    [​IMG]

    Prepping the hood tomorrow for inside paint

    Phil
     
  9. Zig

    Zig Member

    Joined:
    Oct 14, 2006
    Messages:
    4,860
    Location:
    Pittsburg KS
    Friggin cool! You are going to beat someone else to a test drive, I can just tell!
    You spend much time away from your truck?
    I remember how hard it was to just walk away when it started coming together.
     
  10. e015475

    e015475 Member

    Joined:
    Mar 13, 2014
    Messages:
    240
    Location:
    Show Low AZ
    I try to go to Wyatt's shop everyday to work on the truck. It's kinda like working but a lot more fun. Still have to fight the traffic everyday which I don't seem to mind as much as when I was working. Retirement is better than I'd expected, at least so far.

    Things will slow down a bit in the summer after the truck is home in the shop, so I probably won't get a test drive under my belt till fall. I have a MG TD going in to Wyatt's as soon as the truck is done and I'm planning to work mornings on the MG and in the afternoons on my truck at home.

    Inside of the doors and jambs painted tomorrow. More photos coming this weekend

    Regards
     
  11. e015475

    e015475 Member

    Joined:
    Mar 13, 2014
    Messages:
    240
    Location:
    Show Low AZ
    Mo progress.

    Taped up the door jambs and painted them - bottom sage green and above the belt-line is white-
    [​IMG]
    Jambs painted out-
    [​IMG]
    Doors done too, and color sand starts Monday - sorry, was a little shaky for this photo

    [​IMG]

    Door closeout looks pretty straight

    [​IMG]

    Made this door card out of 5052 aluminum. Will bead roll some details into this at home.

    [​IMG]

    Dash is cut and polished

    [​IMG]

    That's about it for now.

    Phil
     
  12. Bill Hanlon

    Bill Hanlon Member

    Joined:
    Jun 4, 2002
    Messages:
    2,723
    Location:
    Fredericksburg TX
    No bearclaw latches??
     
  13. e015475

    e015475 Member

    Joined:
    Mar 13, 2014
    Messages:
    240
    Location:
    Show Low AZ
    Gotta have um if you want to have your doors stay closed going around corners.

    Here's the door side back when it was first fab'd. I didn't use the Altman kit and modified a stock door lever to actuate and Autoloc bearclaw. The linkage goes around the window glass - sounds a little complicated, but I mocked it all up before painting and the action was very smooth

    [​IMG]

    Here's the post for the bearclaw on the b-pillar side-

    [​IMG]

    It was recommended that I add a little reinforcement to this over concern that the post might rip out of the pillar easily in an accident. So I made some backing plates out of some stainless plate and put a brushed finish on them - here it is with some masking tape to protect the face -
    [​IMG]

    The linkage is a bell crank, two rods and some miniature (10-32) heim joints - will post details when I build the doors out after painting
     
  14. Zig

    Zig Member

    Joined:
    Oct 14, 2006
    Messages:
    4,860
    Location:
    Pittsburg KS
    Odd thing about my doors. I have what latches came with the thing and have not had the slightest idea that the doors have even thought about coming open.
    Of course I always lock the door as soon as I close it, so that may help.
    I still need to install shoulder harness seat belts, however.
    Your truck is really coming along!
     
  15. Bill Hanlon

    Bill Hanlon Member

    Joined:
    Jun 4, 2002
    Messages:
    2,723
    Location:
    Fredericksburg TX
    Phil:

    Your latch installation was so clean that I didn't notice it in the pictures you posted last Saturday PM. Great work as usual.

    - Bill
     
  16. e015475

    e015475 Member

    Joined:
    Mar 13, 2014
    Messages:
    240
    Location:
    Show Low AZ
    Zig - I don't have any actual experience with the stock AD door latch, but I'd read people have had problems with them. My understanding was a good original latch would work well, but the repo new ones we a potential problem. Did the bearclaws to be 'safe than sorry'

    Bill - Tried to make them as inconspicuous as possible - So I guess.....thanks for not noticing!
     
  17. e015475

    e015475 Member

    Joined:
    Mar 13, 2014
    Messages:
    240
    Location:
    Show Low AZ
    a little more progress on developing some door panels using the bead roller - these were a little better, but still can't clear the window crank boss on the door with raised panel. Going to the metal store Monday for some more aluminum to try a deeper raised panel set of dies. Raising the panel with the bead roller moved the holes I drilled to mount it closer together (duh?) so I'll match drill them after I bead roll next time.
    [​IMG]

    Another view-
    [​IMG]
    The new panel laid in the aperture pretty well before I ran it through the bead roller so I'm going to have to experiment a little by bending it less next time. Ordered a new hole transfer tool for the 10-24 screws and a 82 degree countersink cutter to see if I can get the screw holes a little more precise.

    Oh, and the inside of the doors are cut and buffed and the doors were hung back on the truck. Painting the inside of the hood next week, then on to prepping the bed parts for paint.
     
  18. 50 Chevy LS3

    50 Chevy LS3 Member

    Joined:
    Jan 14, 2013
    Messages:
    951
    Location:
    Indiana
    Phil,
    Is that paint available at your local auto paint store, or did you order it from the web?
    Have you decided on exactly, what color white, your going to use? I know to some that sounds silly, but, there are a million shades of "white".

    Steve.
     
  19. e015475

    e015475 Member

    Joined:
    Mar 13, 2014
    Messages:
    240
    Location:
    Show Low AZ
    I've been buying my paint from a local auto paint distributor. Using Matrix because thats what the painter is comfortable with, but I hear lots of food things about Southern Polyurethane's clear coat and that's available on the web.

    The white is a very creamy white like you see on a lot of the two tone GM sedans from the fifties. If I can get some more detail I'll post it

    Best regards Phil
     
  20. e015475

    e015475 Member

    Joined:
    Mar 13, 2014
    Messages:
    240
    Location:
    Show Low AZ
    Took a short vacation with my wife to the White Mountains in northern AZ last week, but got a few good licks in this week on the '49. (Caught the last snow of the season in Greer - wife thought it was quite a treat)

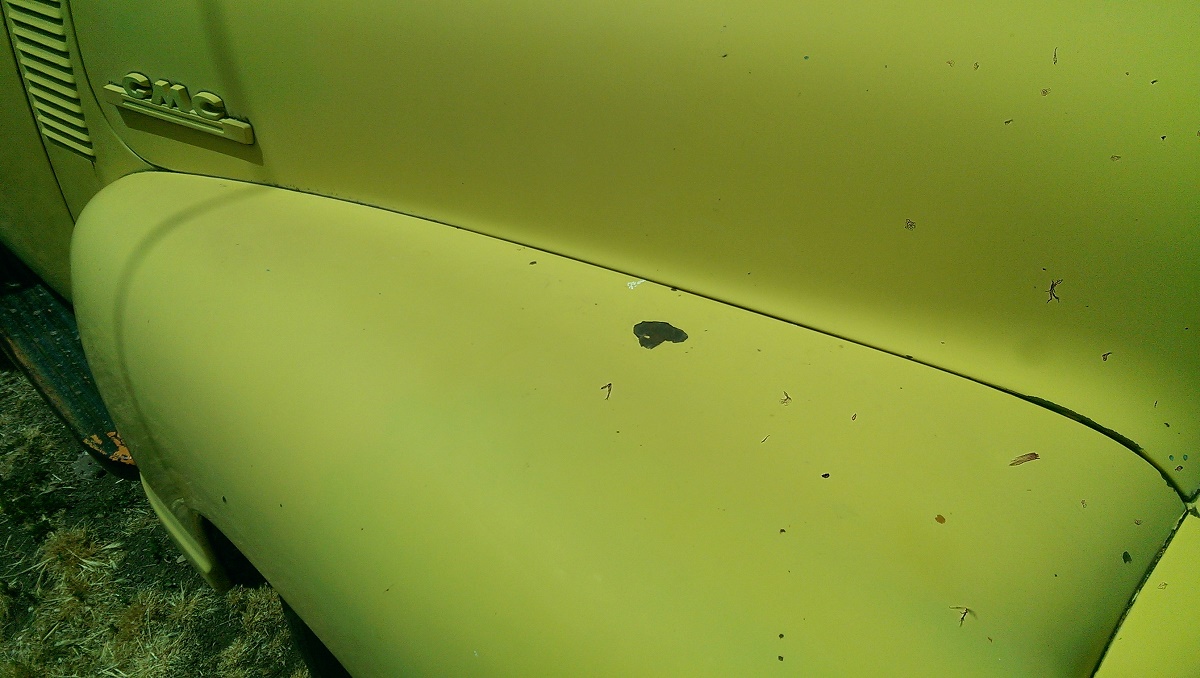
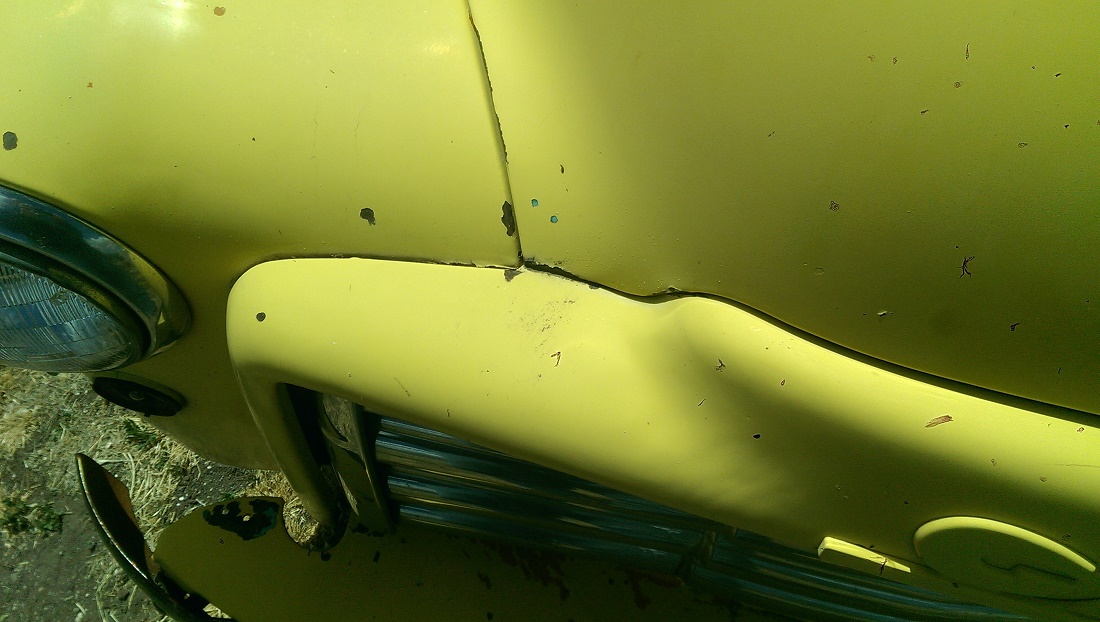
    We poked around Springerville one afternoon, and outside an antique store my wife wanted to visit was a '51 or '52 GMC that looked to be pretty original, so I took a few photos. This is picture of the hood to fender fit - I aspire to get mine to fit as nice.

    [​IMG]
    And another where the grill surround, hood and fender all come together[​IMG]

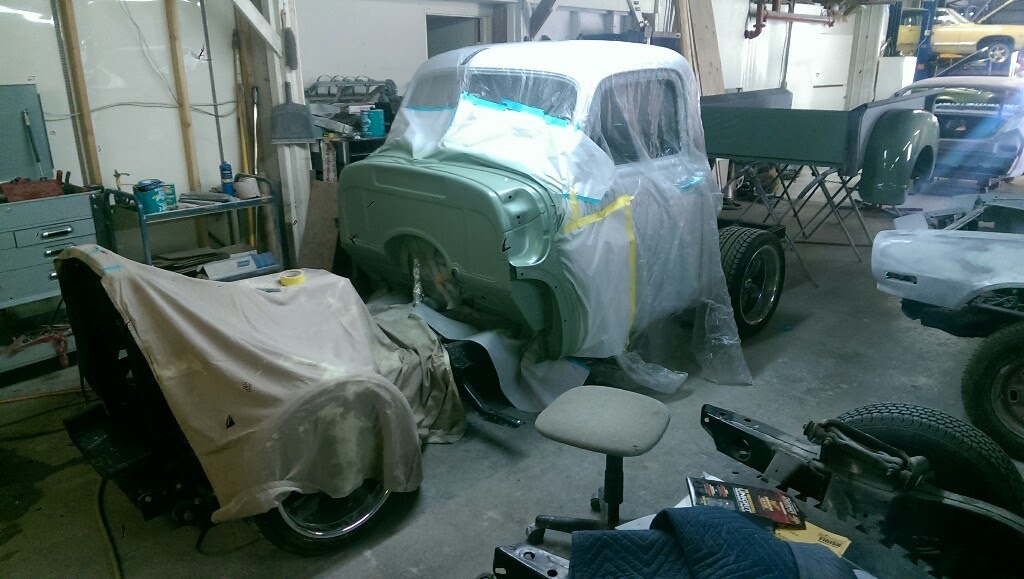
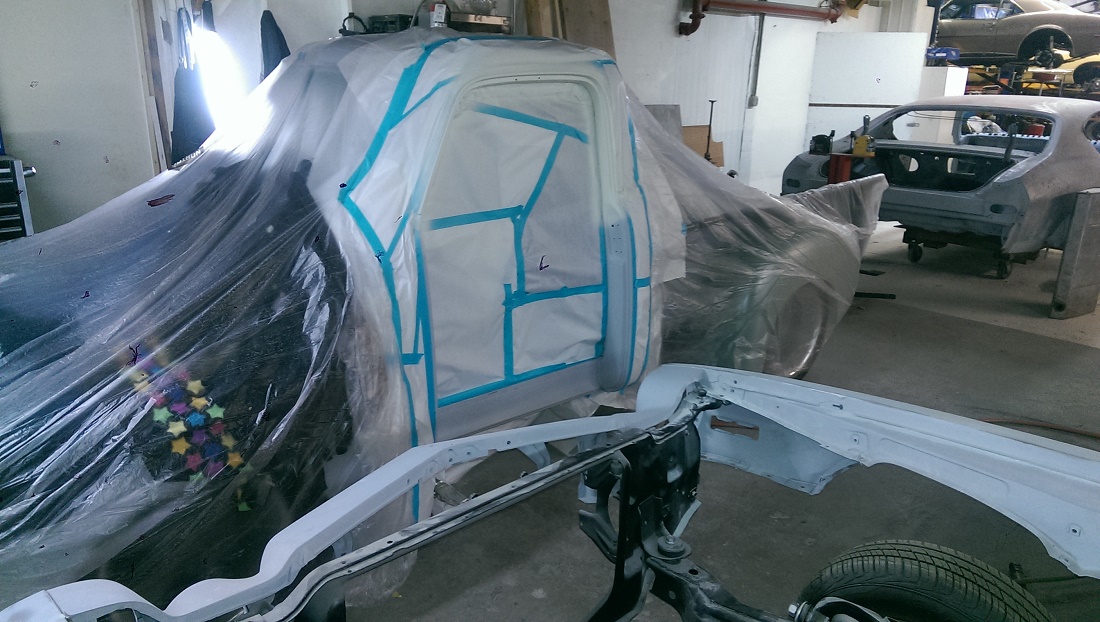
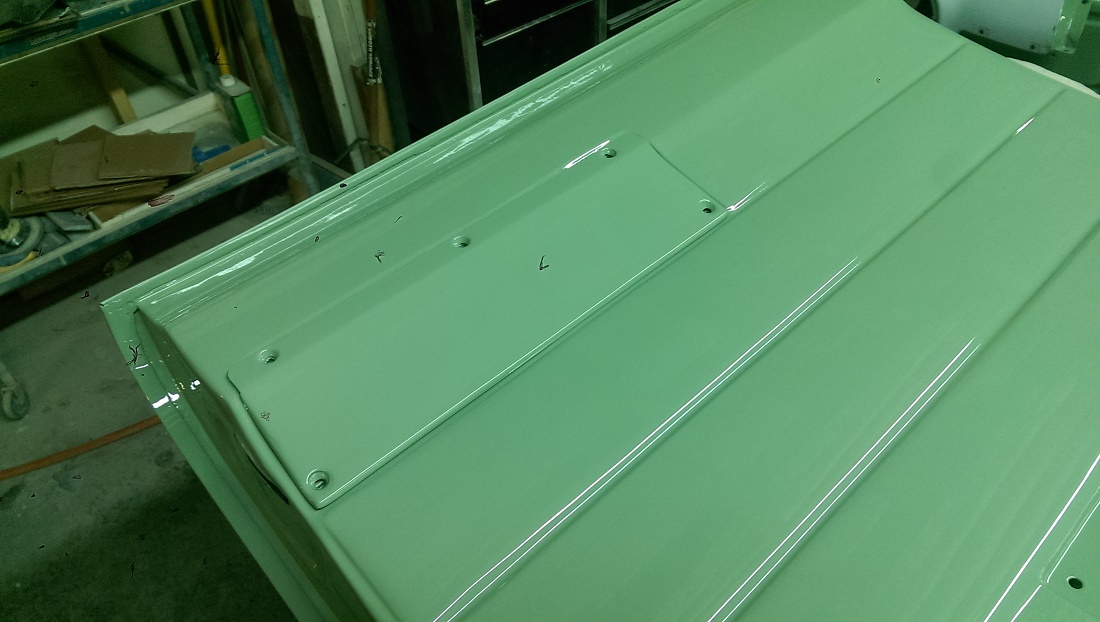
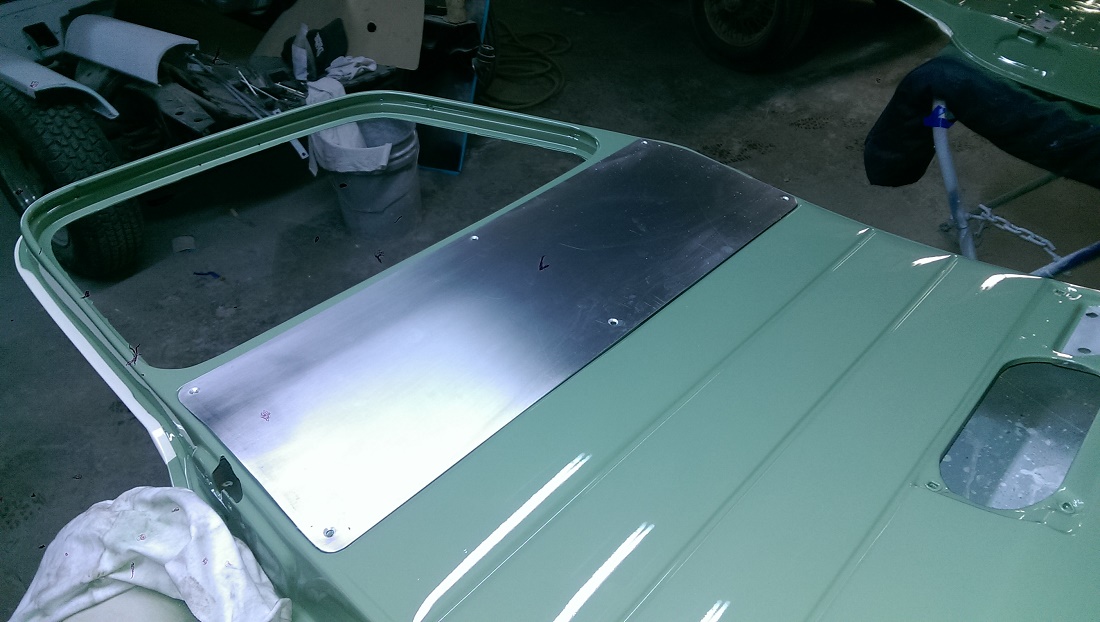
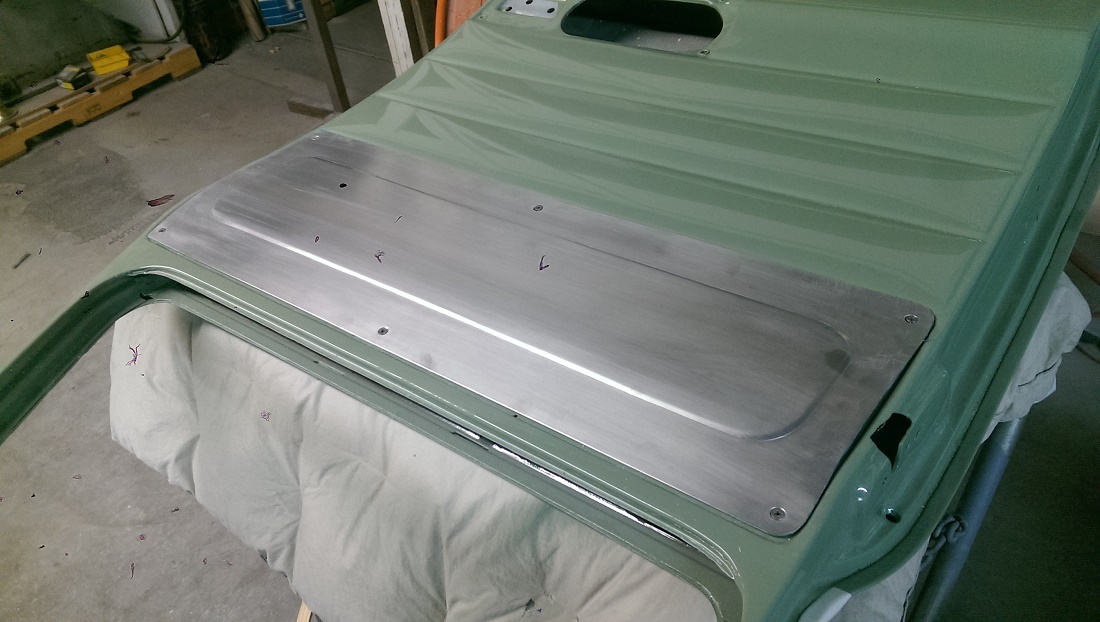
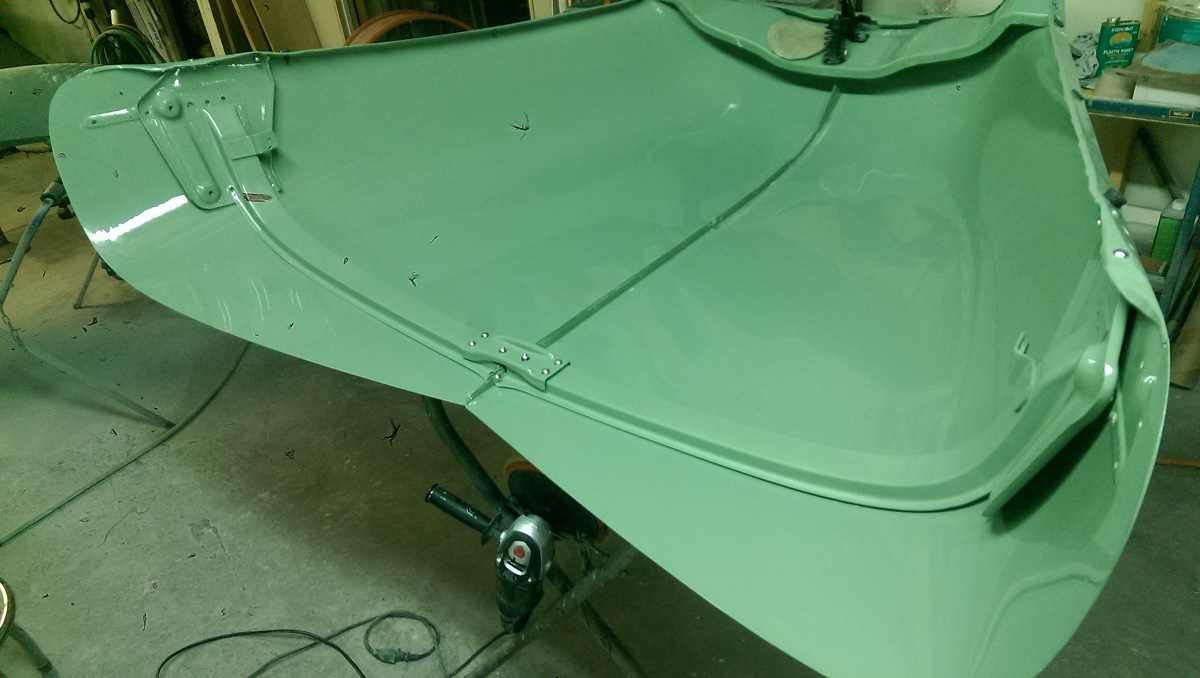
    Took all of the structure out from inside the hood, did the final sanding, painted it, color sanded then buffed it. Assembled it with new stainless fasteners.

    [​IMG]

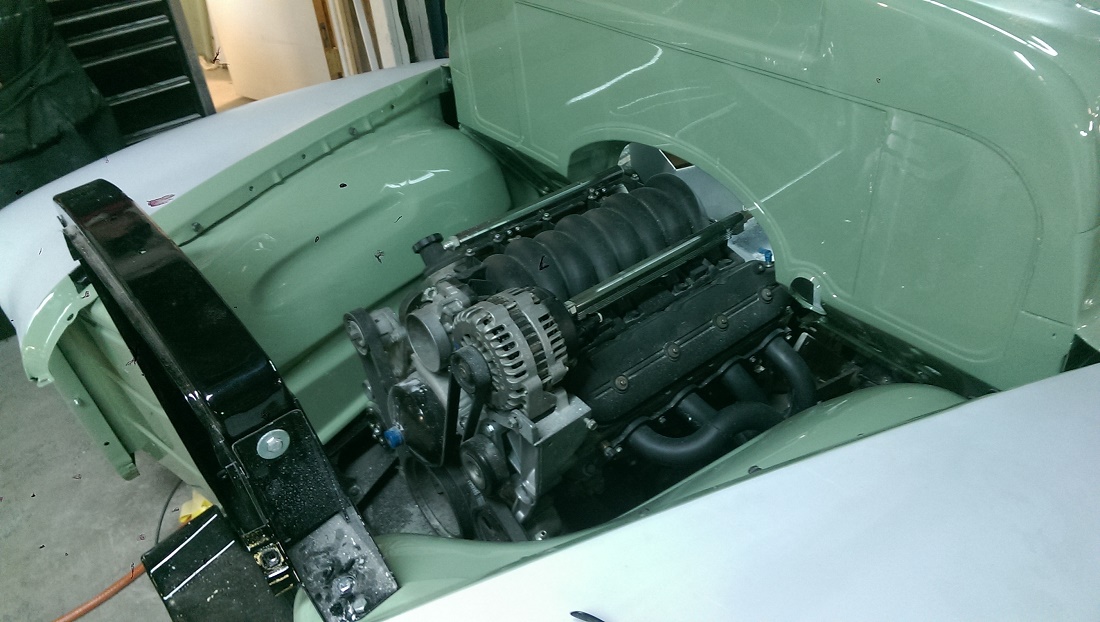
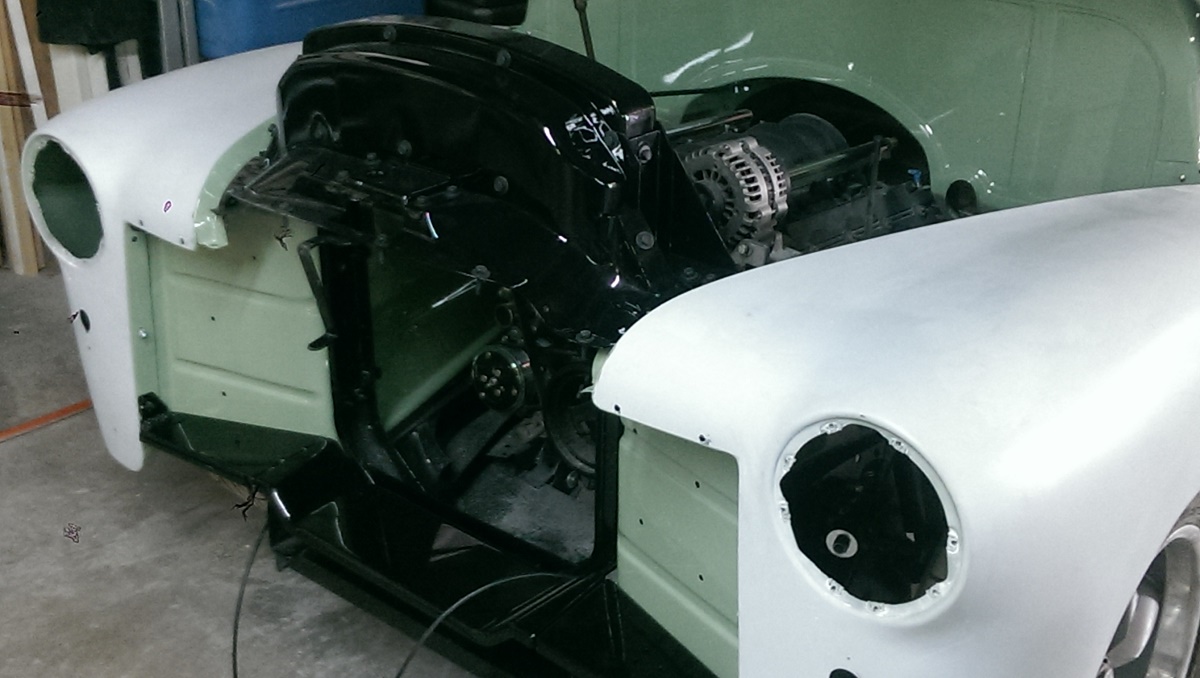
    Put the hood back on the truck for what I hope is the very last time. Put all the radiator support sheet metal in with the new fasteners and will align and tighten down the front end for painting

    [​IMG]

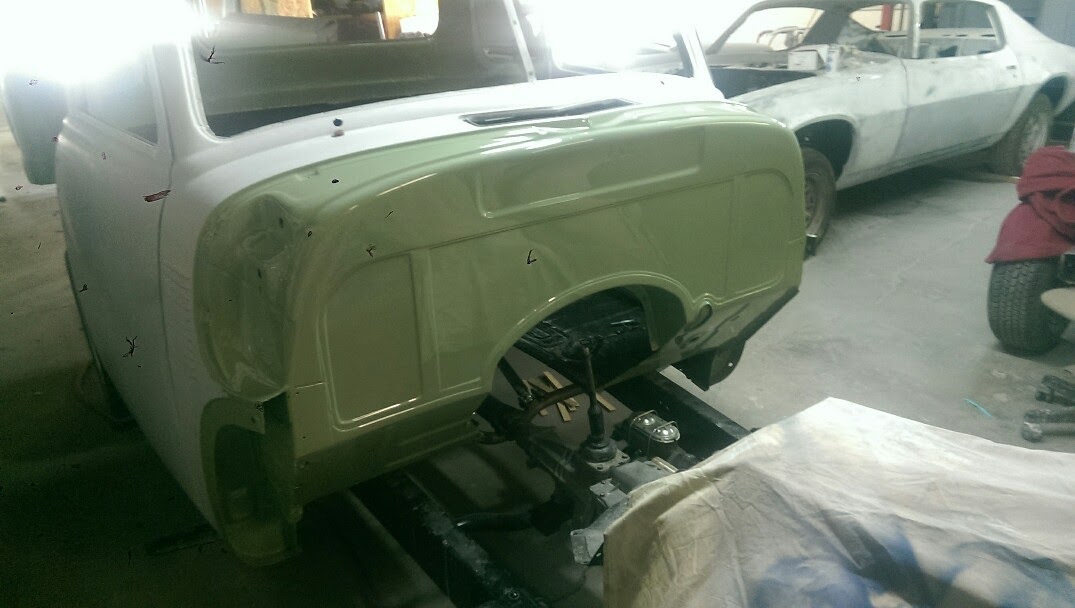
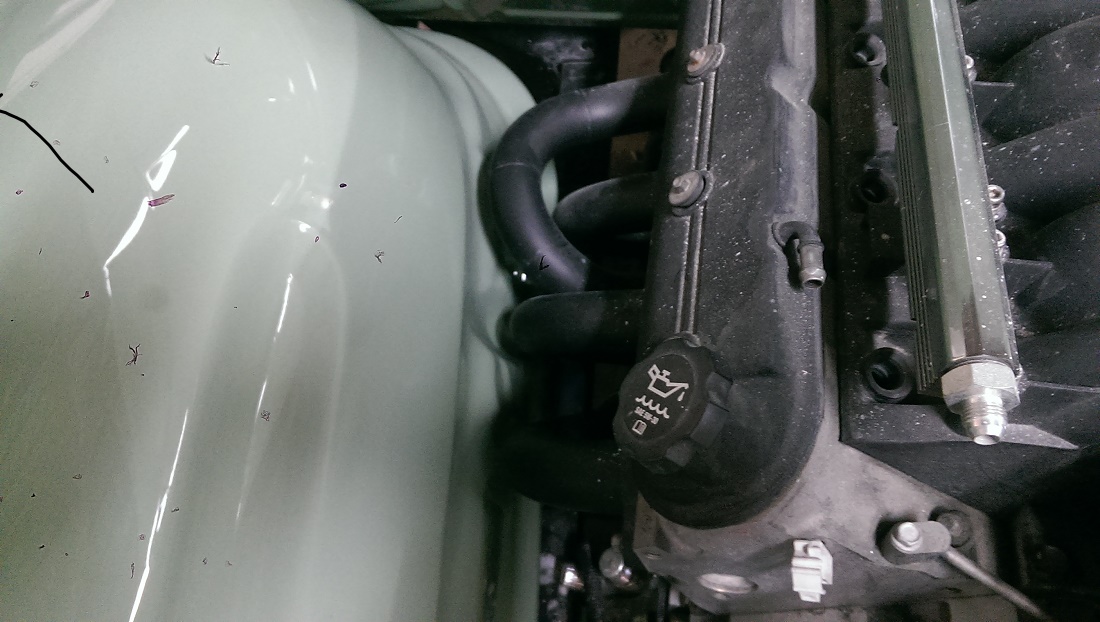
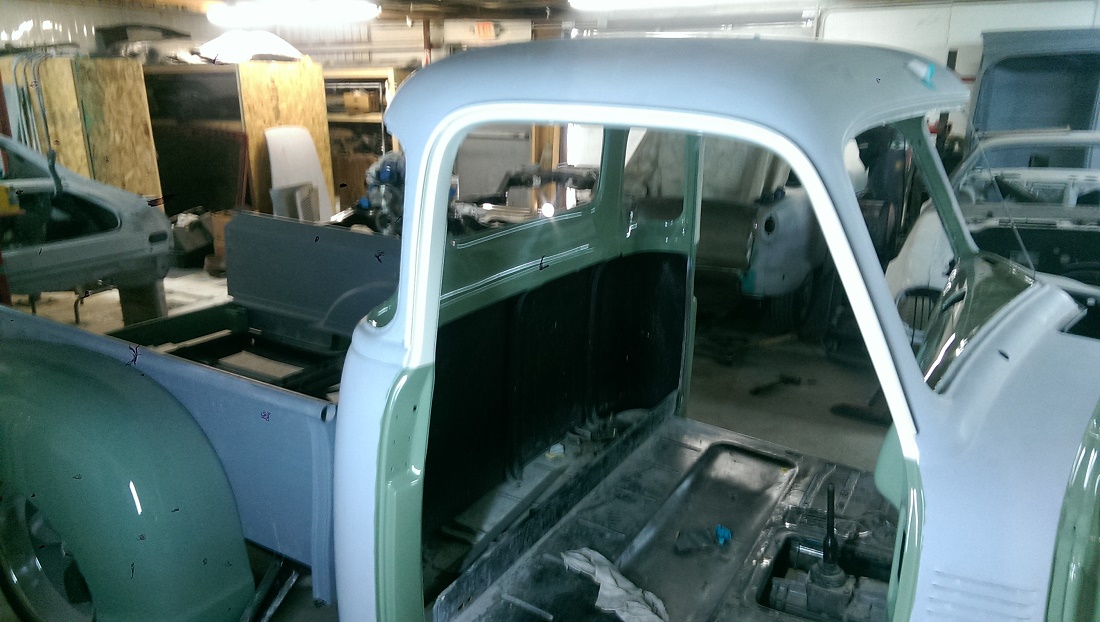
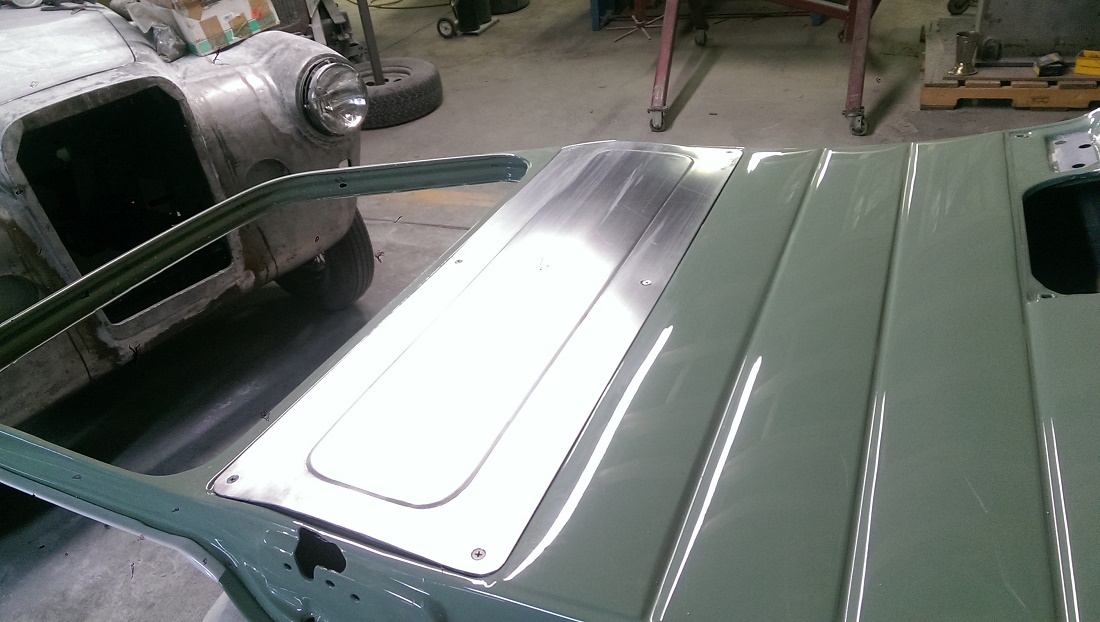
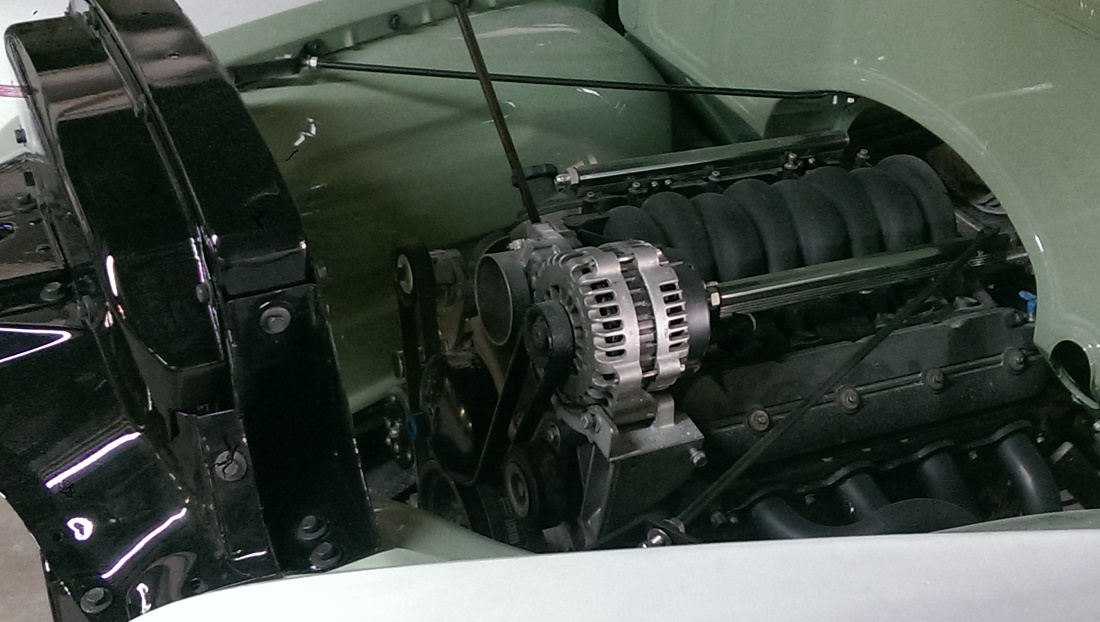
    Another view. Might change direction on the engine and paint the intake and valve covers gloss black to match the radiator surround and slam panels.

    [​IMG]

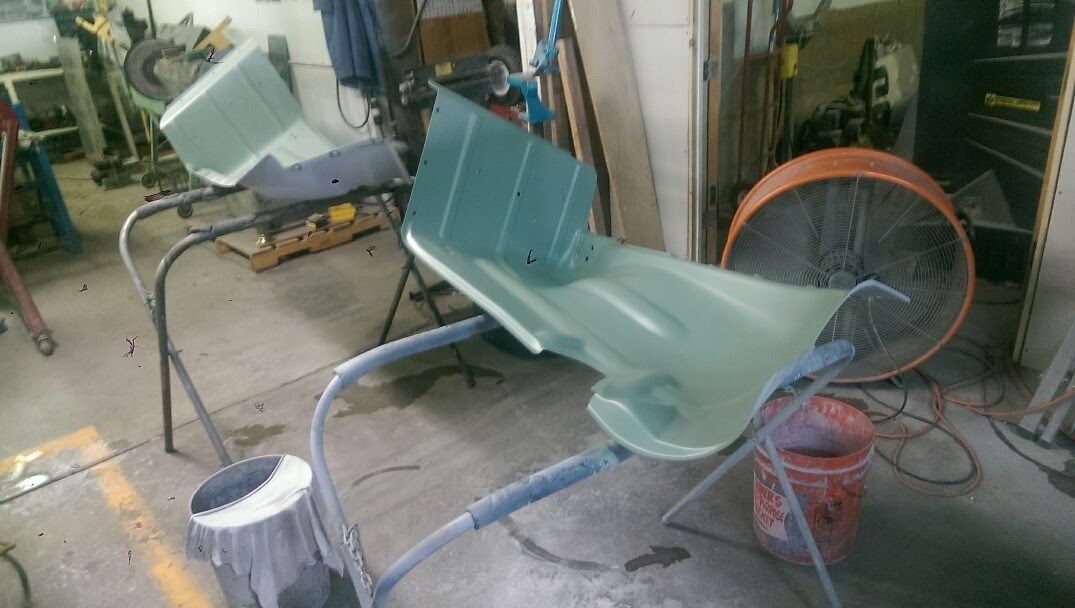
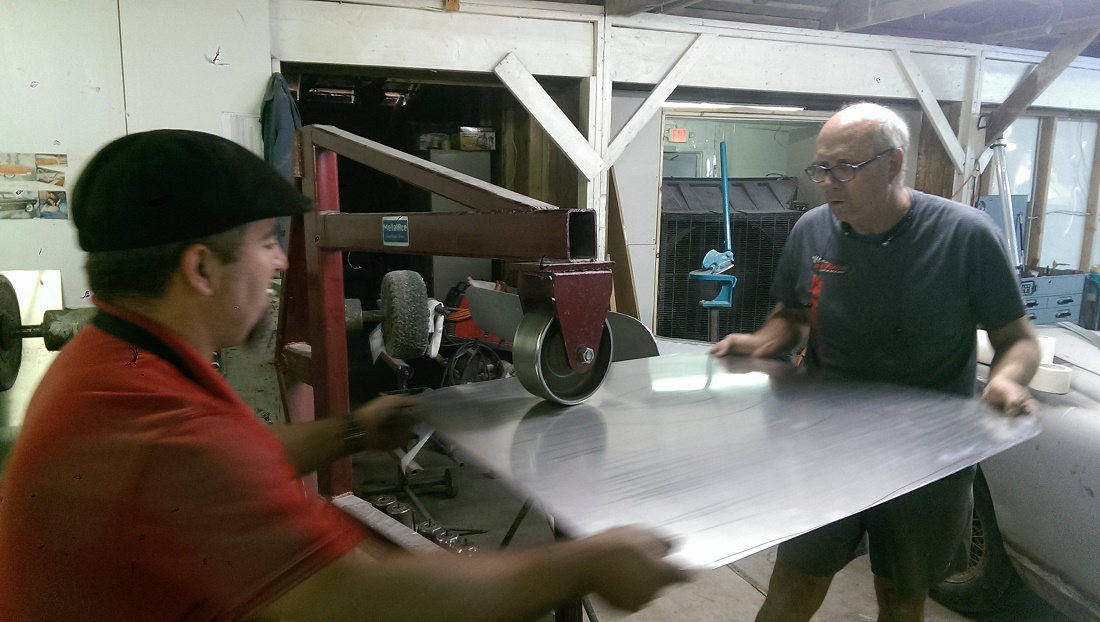
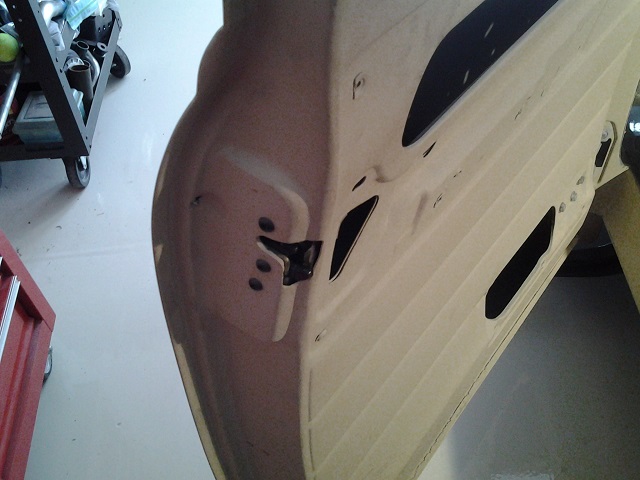
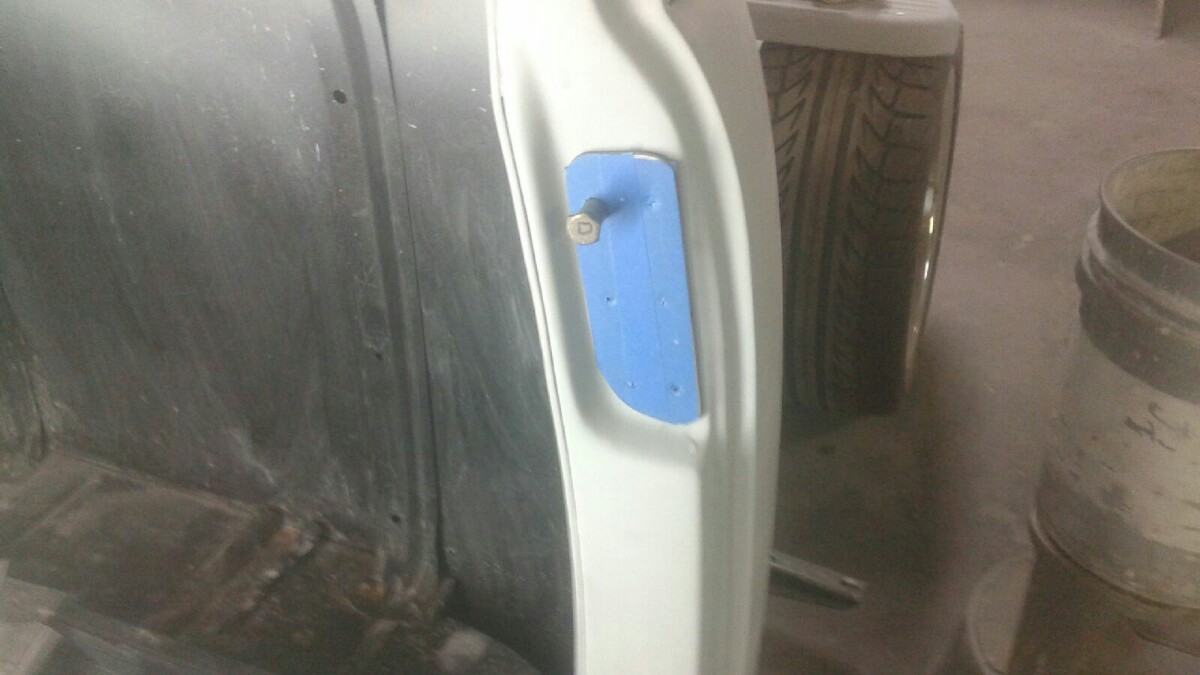
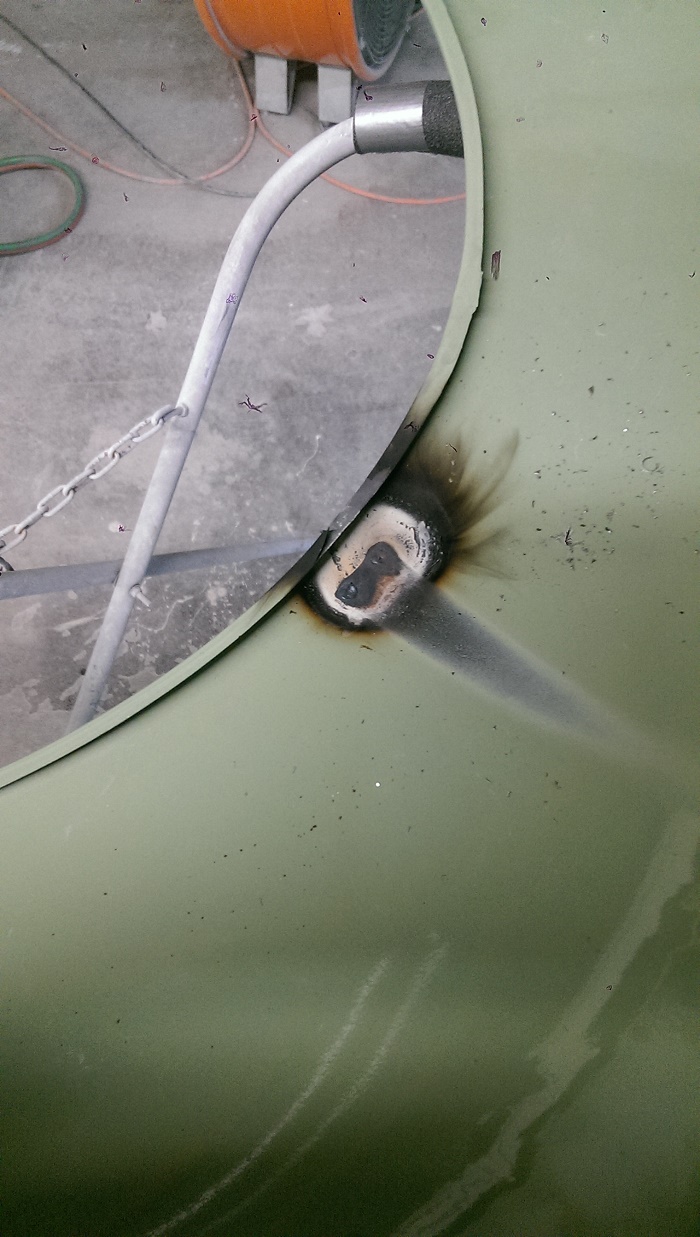
    I'd kept the brace and rivets in the rear fenders but on painted trucks I often see them cracking the paint around the rivet. We have to repaint the rear fenders anyway, so I asked Wyatt to drill them out and fill the holes. Here's the inner brace removed and the holes gas-welded shut.

    [​IMG]

    Wyatt ground the welds then planished them a little

    [​IMG]

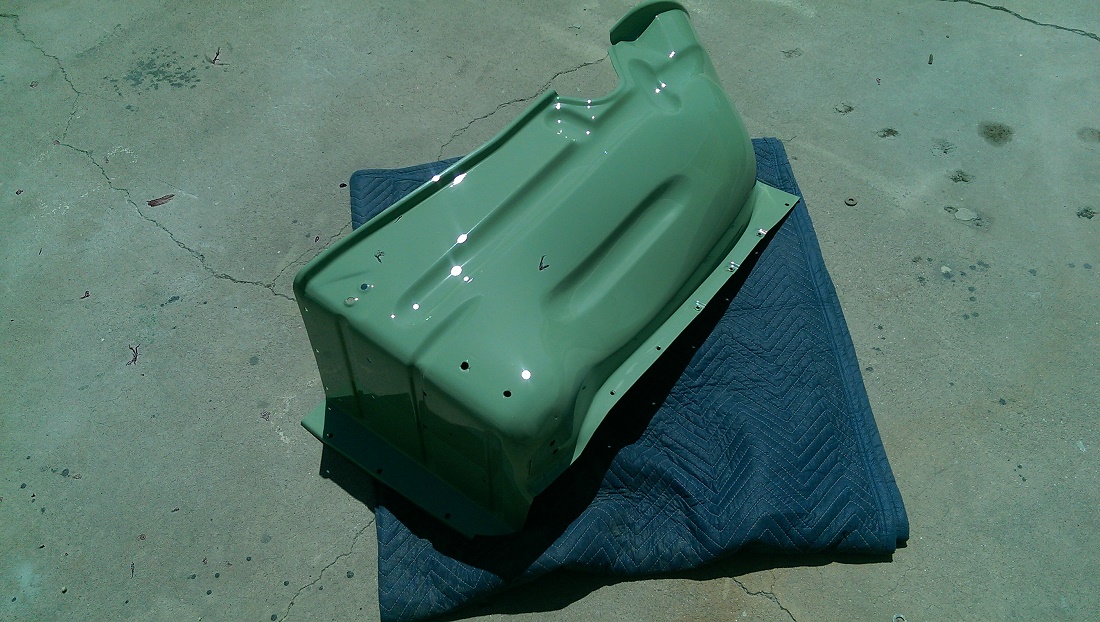
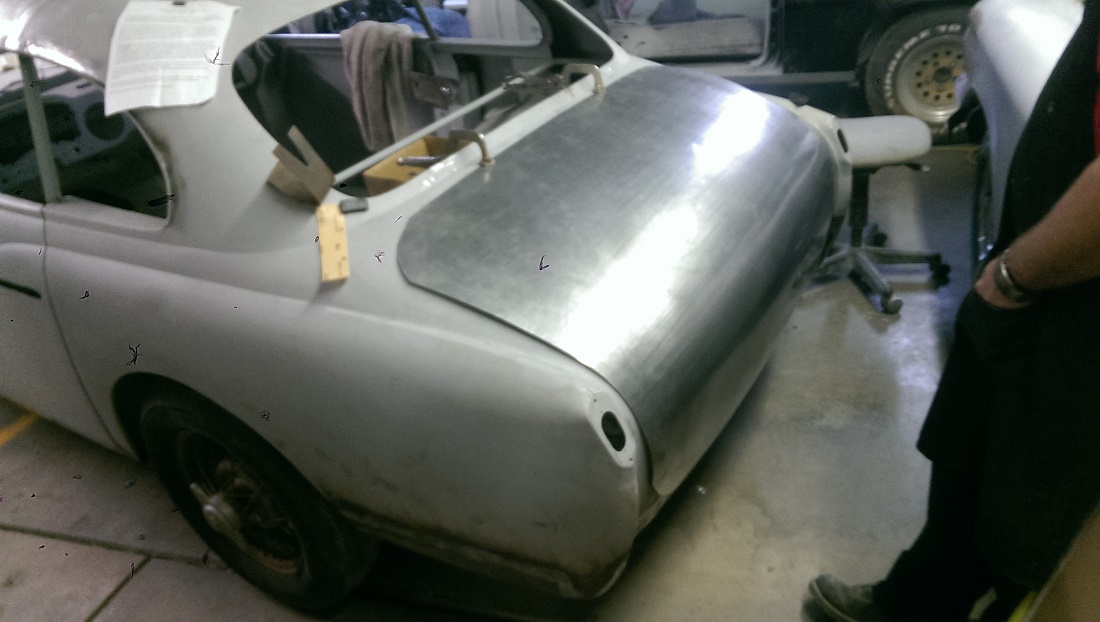
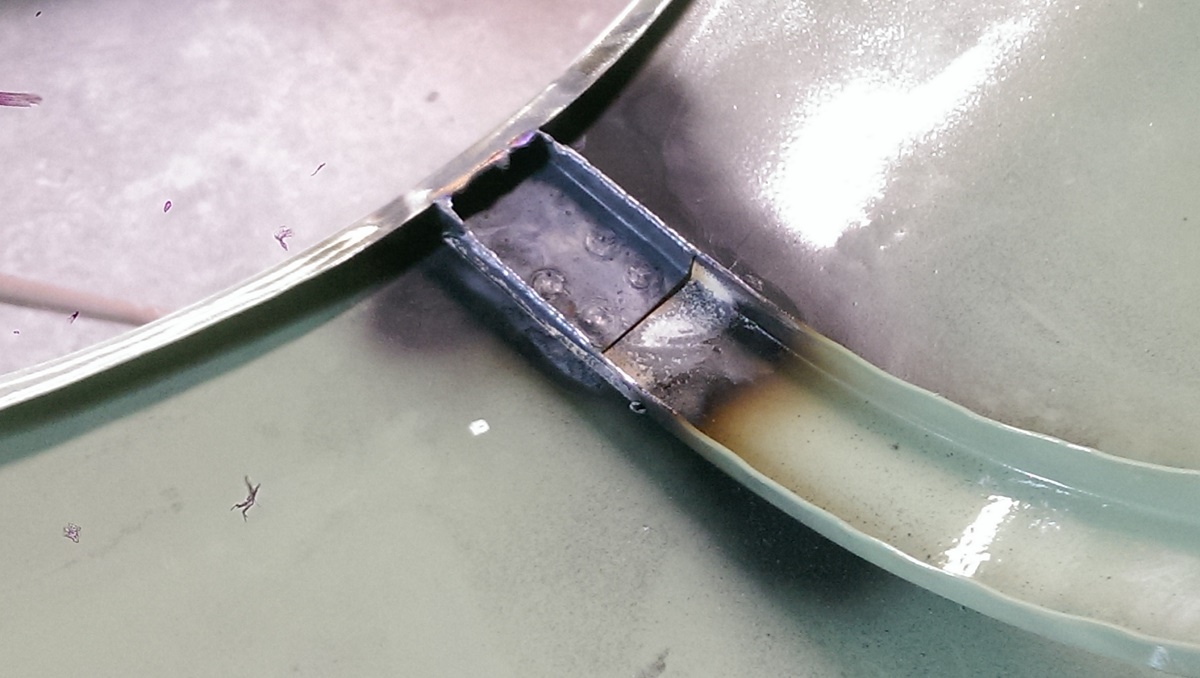
    The inner brace was reinstalled by extending it and welding it to the fender lip to minimize the potential for cracking. The plug welds just hold the extension on the brace and a peanut weld at the edge of the lip connects the brace to the fender.

    [​IMG]

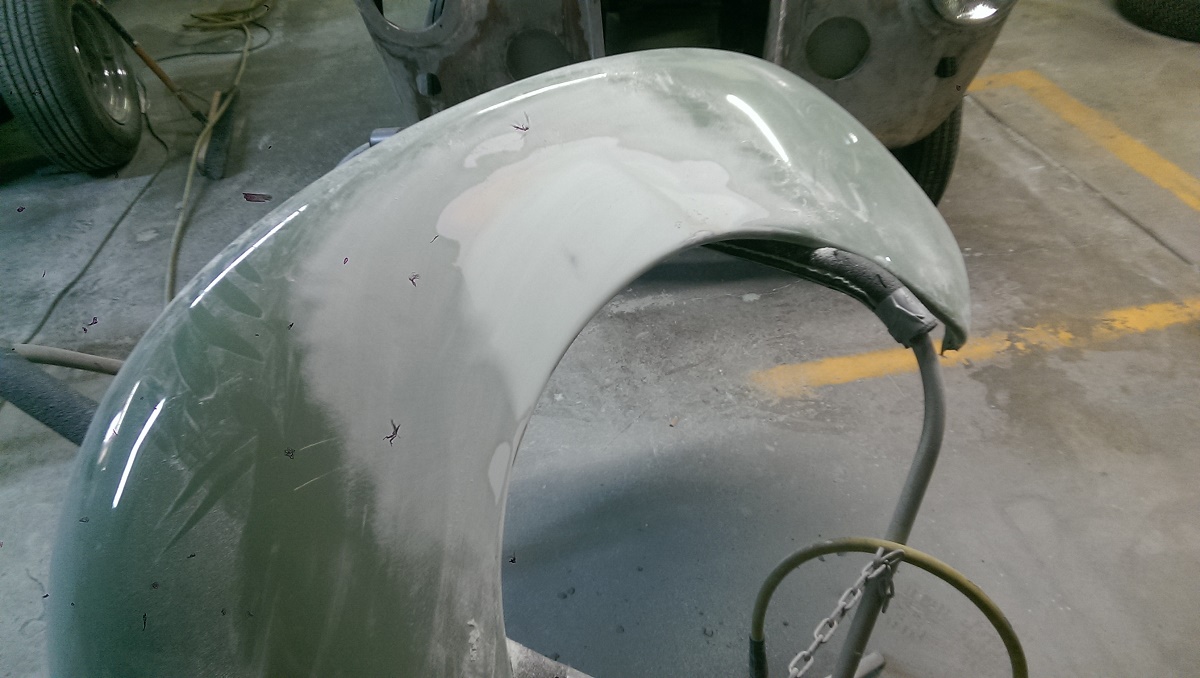
    A skim coat of filler, sanding and the fender is ready for primer.

    [​IMG]

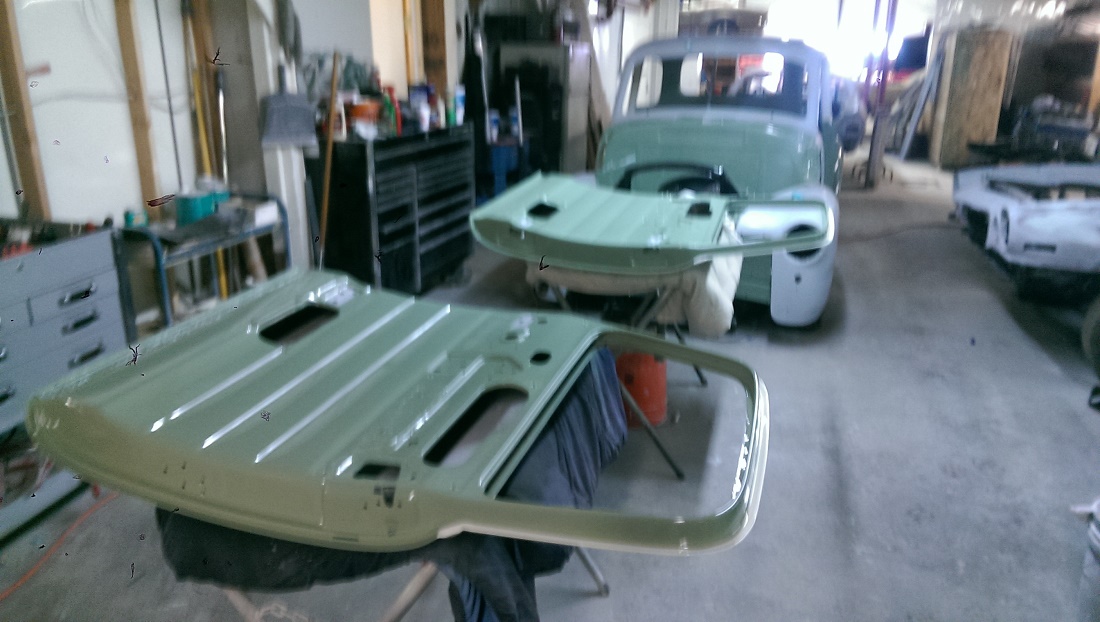
    Final blocking of the bed starts next week, but it should go pretty quick since it is new MarK sheet metal. Anticipating two days in the paint booth - one for the cab and front end, and another for the bed and rear fenders.

    With regards, Phil
     

Share This Page