49 GMC Progress Report

Discussion in '1947-1954' started by e015475, Jun 20, 2015.

  1. e015475

    e015475 Member

    Joined:
    Mar 13, 2014
    Messages:
    240
    Location:
    Show Low AZ
    Ooops. Fat fingered it. Here's the collector
    [​IMG]
     
  2. 50 Chevy LS3

    50 Chevy LS3 Member

    Joined:
    Jan 14, 2013
    Messages:
    951
    Location:
    Indiana
    Very nice work. Be glad I don't live in your neighborhood, Phil. I'd probably want to come over every weekend to see what your doing...

    Steve.
     
  3. e015475

    e015475 Member

    Joined:
    Mar 13, 2014
    Messages:
    240
    Location:
    Show Low AZ
    I wish somebody would - it is getting a little lonely over here. Just remember if you show up, you might get pressed into service.

    It has been a couple of weeks, so I guess it's time for an update. Looks like I'm just about over the header fiasco, so I'll wrap that up with a few last pics, never to be seen again, thank goodness. What a giant time-suck that was - almost a month of my shop time spent on this deal.

    Here's the view from the back of the chassis with all the primaries welded up. Need to go get one of the old inner- fenders out of storage and see if I'm going to need any relief to clear the tubes. Bought a starter motor to make sure I had plenty of clearance to the pax side headers. (geez, that S10 shifter has to go)

    [​IMG]

    No expense was spared to jig these headers to tack the flanges - bungee chords, worm clamps, safety wire, paint sticks, cabinet shims and pieces of packing foam were all used. Had two broken flange bolts - both below the surface of the head. Heated with the Tig torch and drilled them. Came right out with an ezout.
    [​IMG]
    Here's a weld on the primary - not much burnt chromium in these - pretty blues and straw colors. Wish I could say I welded the primaries, but I had so much time in theme I didn't want to screw them up, so I farmed them out.
    [​IMG]
    There was one 'aw sh*t' in the process. Somehow I managed to get a mandrel bend of regular steel in among all stainless and didn't realize it till all the primaries were welded. You can see the bend that third from the port on the first cylinder is a slightly different color - that's regular steel. Rather than cut it out and start over on that tube, I decided I'd just ceramic coat the headers and be done with it, so that's the plan. (yes, there is a tap stuck in the inlet port of the power steering pump- trying to figure out if I can run a pipe tap in there for plumbing a remote reservoir.)
    [​IMG]
    Next I need to start working on my brakes and make sure all the pedal linkage is going to clear the headers. Bought this hydro boost unit at the local junkyard for $30 (and they pulled it in the 110F heat, whoo-hoo!) Believe it was from an early 2000s Astrovan. Pairing it with a 1979 Corvette master for disc -disc and will put a Wilwood proportioning valve in to keep the rear tires from locking up. The bracket came with the truck and was for a vac booster. Will cut the hydro boost mounting up and weld it to the old vac booster flange to get the hydro boost to fit. Think I'll go with a hydraulic clutch, so that master has to fit in there somewhere too.
    [​IMG]
    A bunch of parts on order, including a new Sanden AC compressor. Can't stand the idea of paying Alan Grove $175 for the compressor bracket, so that's coming up on the list to fab at home.
     
  4. 50 Chevy LS3

    50 Chevy LS3 Member

    Joined:
    Jan 14, 2013
    Messages:
    951
    Location:
    Indiana
    I'm guessing there will be some custom inner fenderwells fabricated. Looking real good!

    Steve.
     
  5. e015475

    e015475 Member

    Joined:
    Mar 13, 2014
    Messages:
    240
    Location:
    Show Low AZ
    Steve,

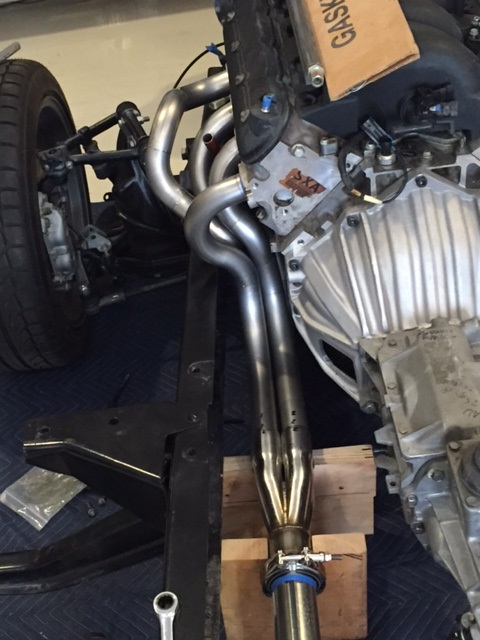
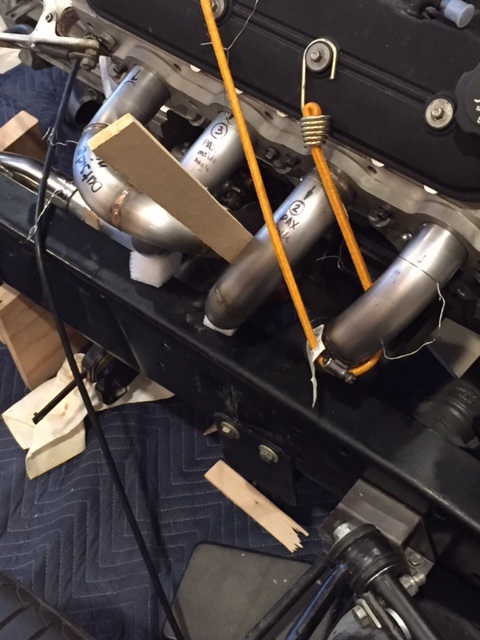
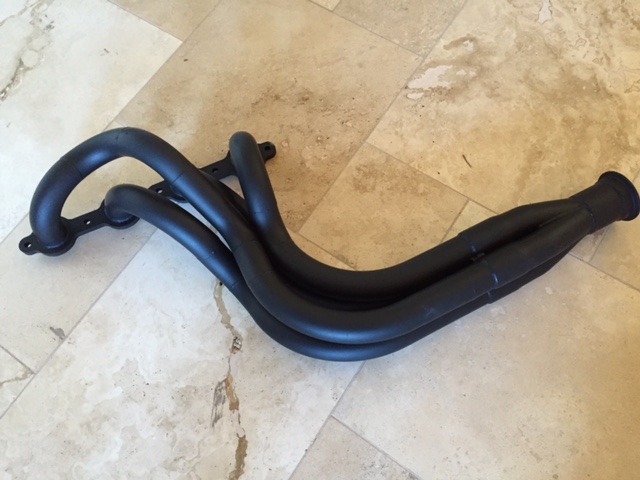
    I'm hoping I don't have to make some custom inner fender wells. I've Googled a lot of pictures of engine bays and I think I'll be OK. Been too lazy to go down to the storage shed and get an old inner fender and try it out. I guess I'll cross that bridge when I come to it this fall when I'm assembling for paint, but my preference is to bump out the factory inner fender well if I need header clearance

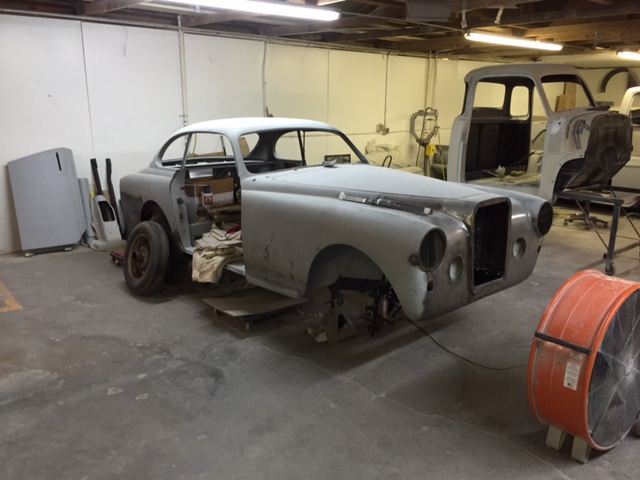
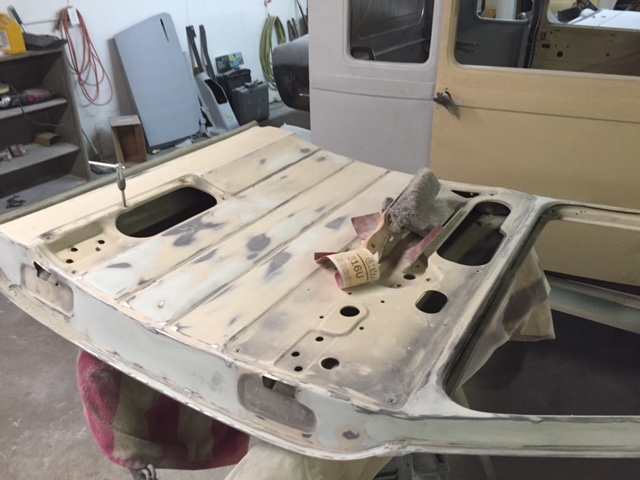
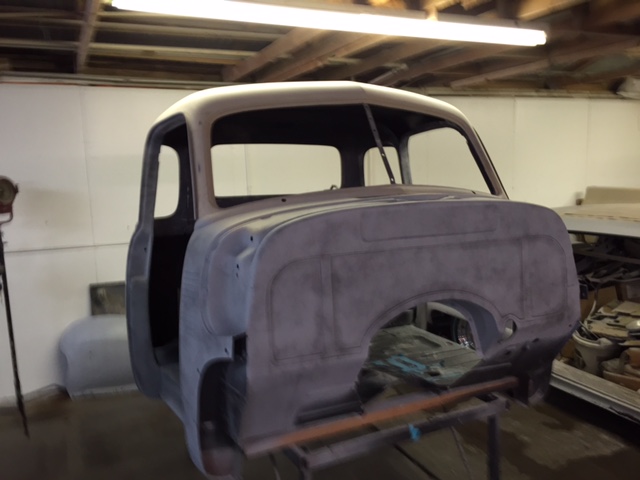
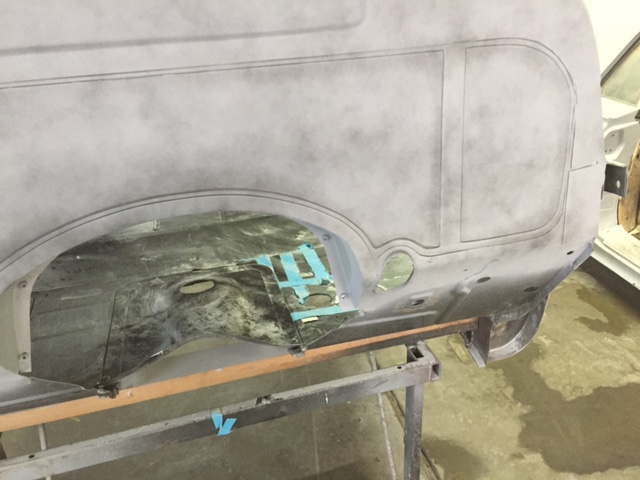
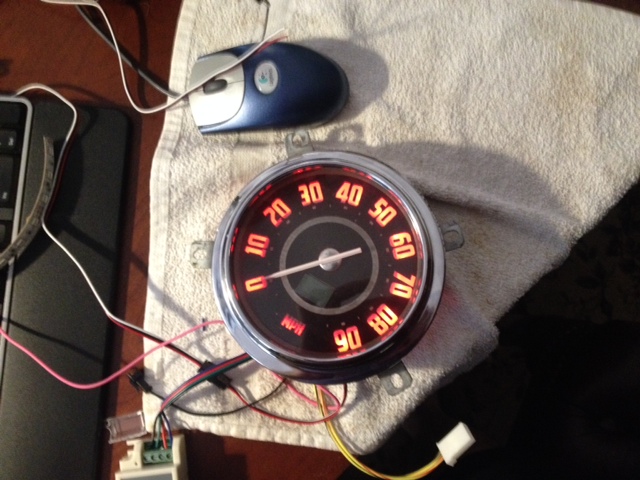
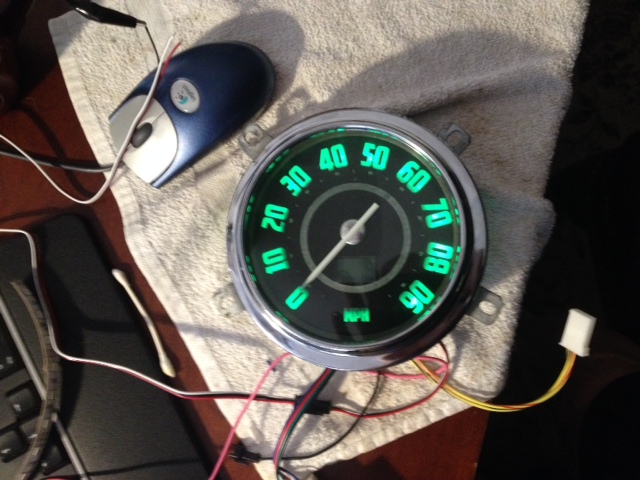
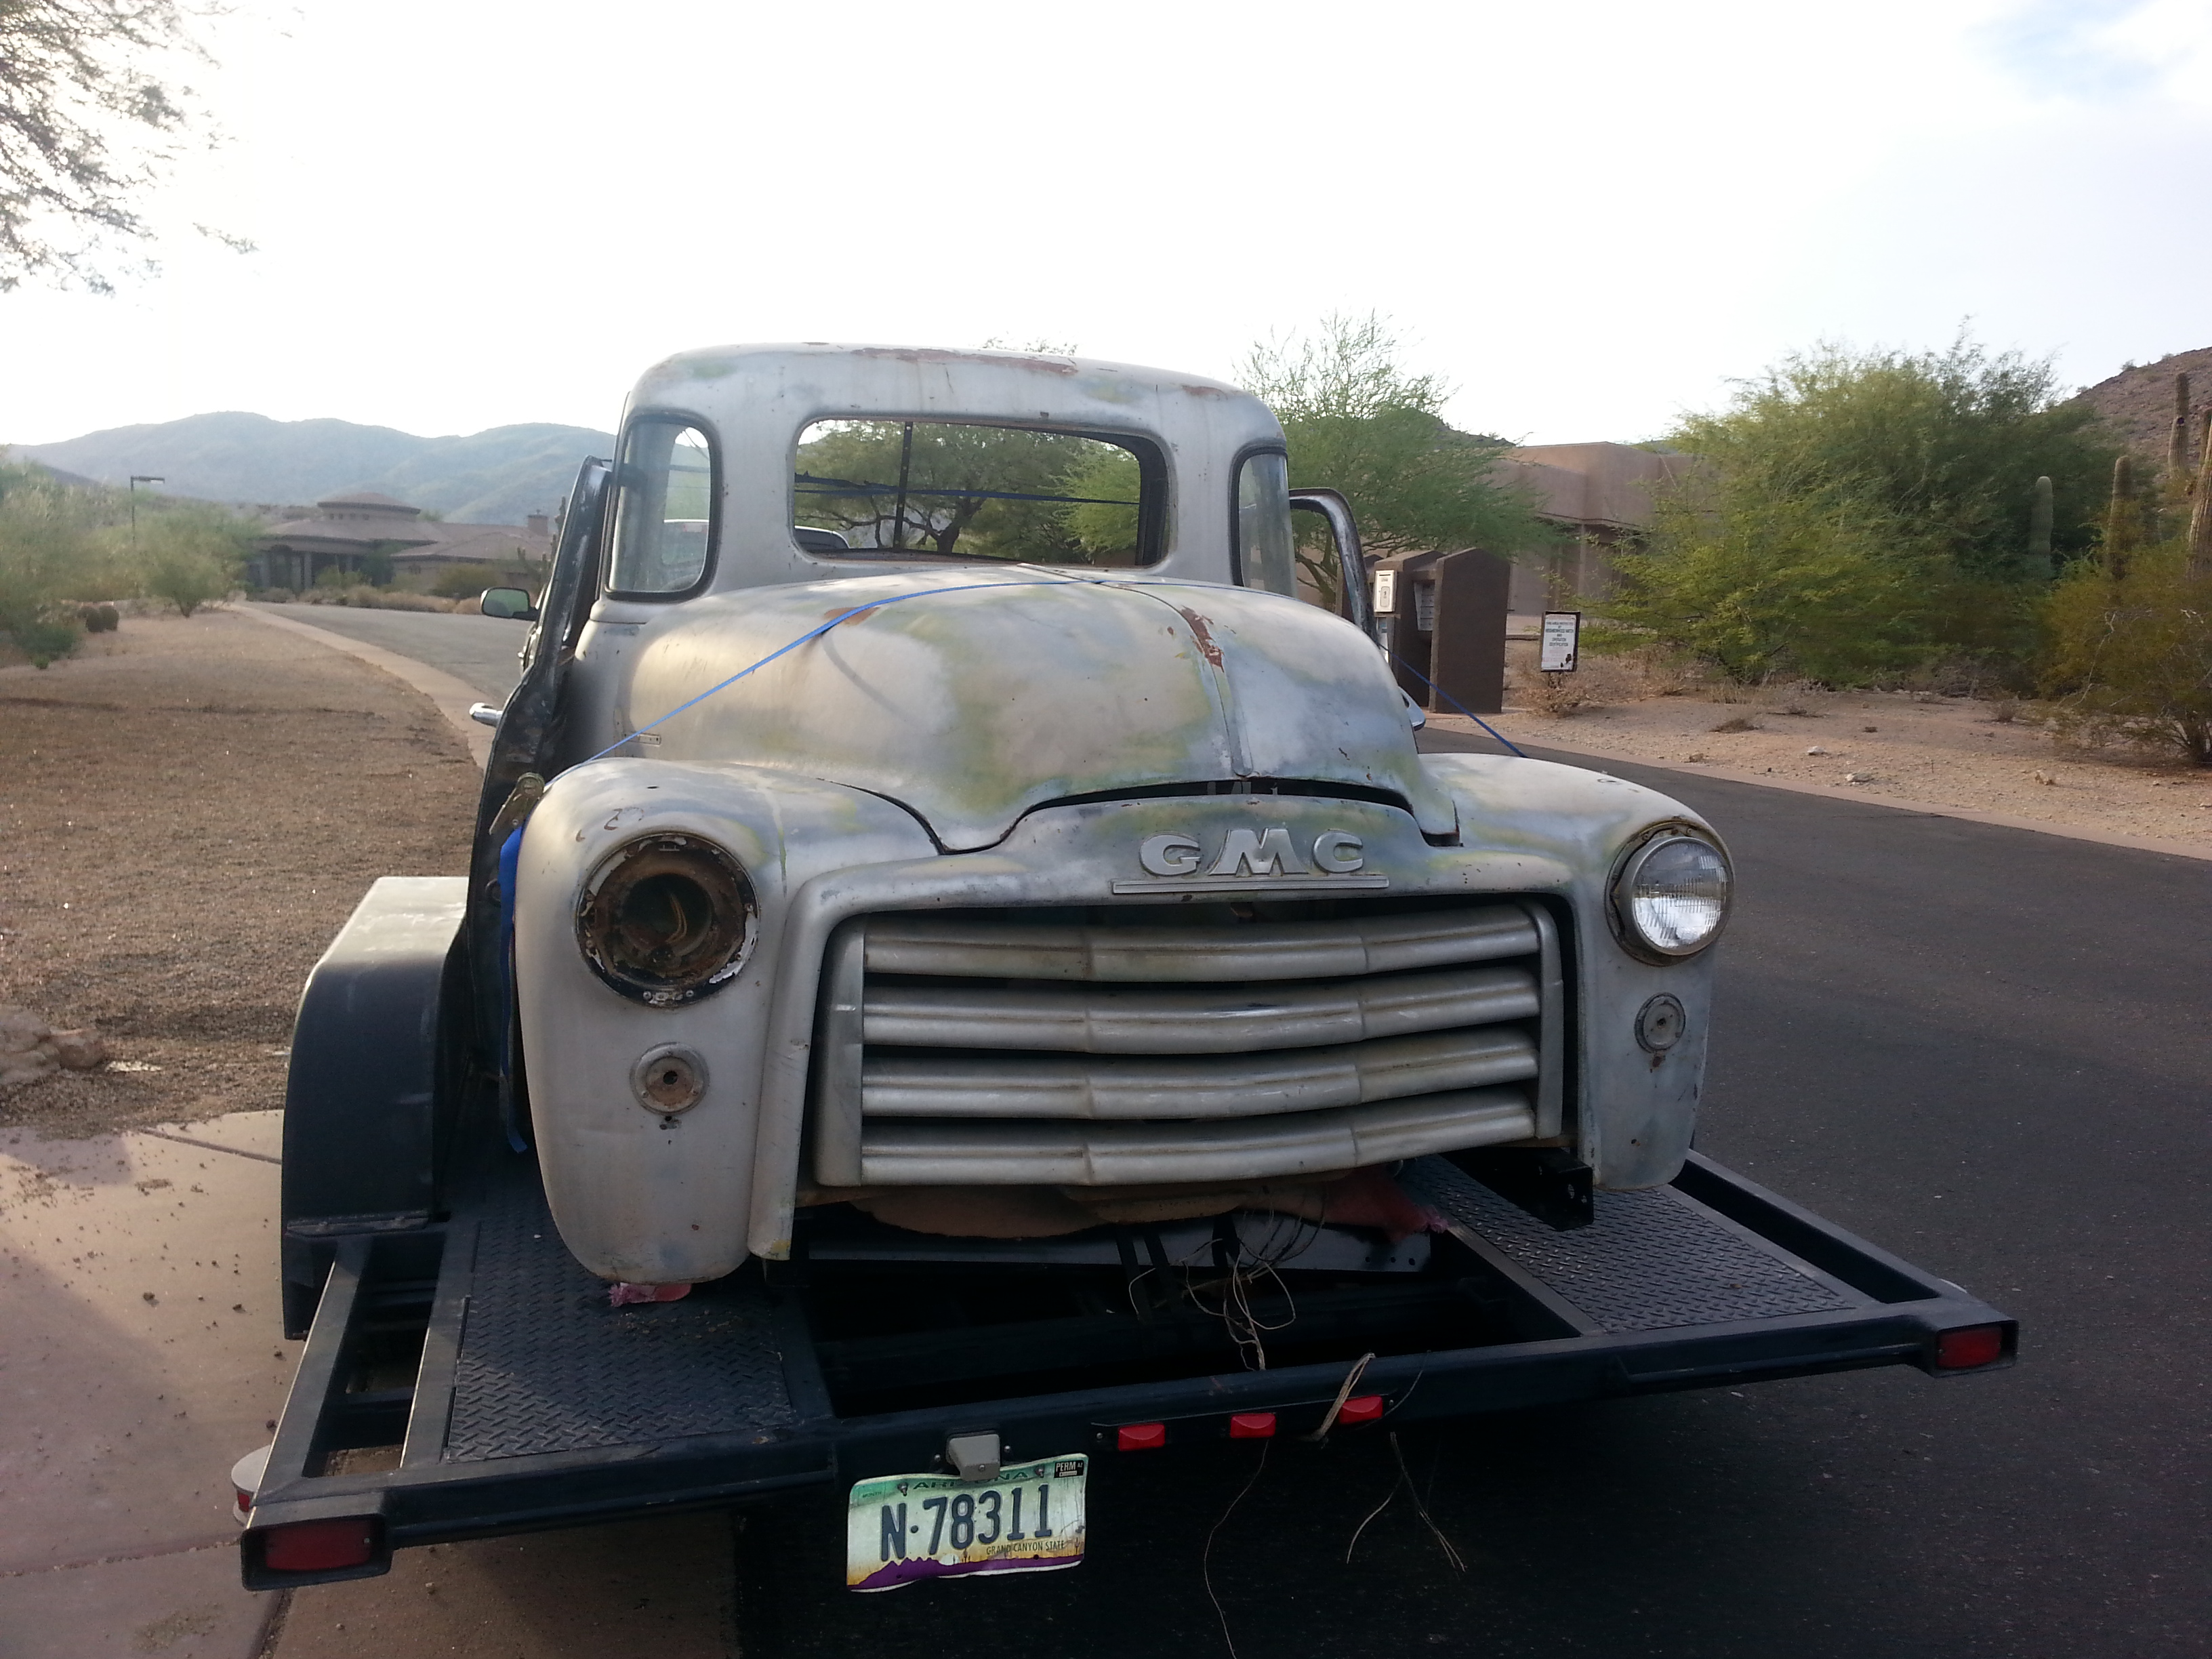
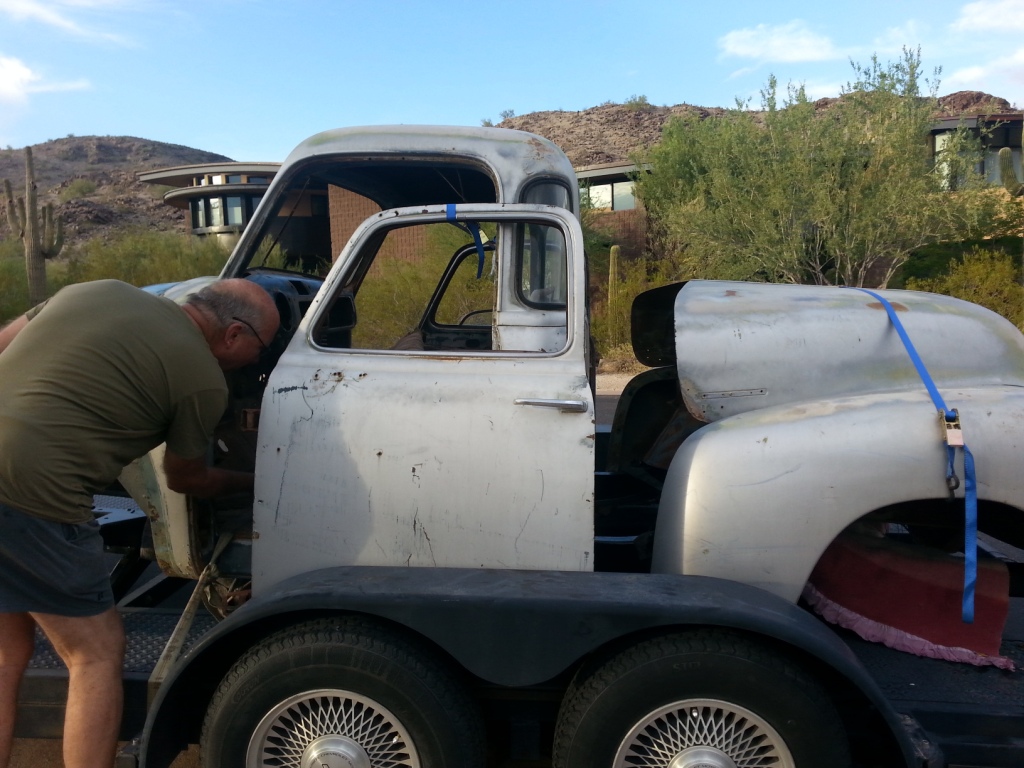
    Here's a few other fotos of recent activity-

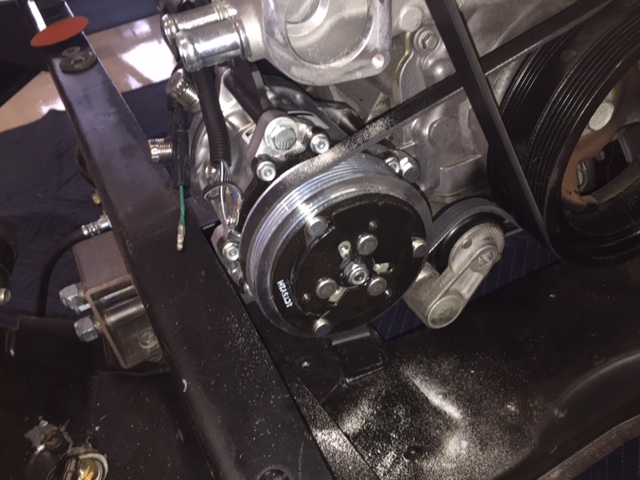
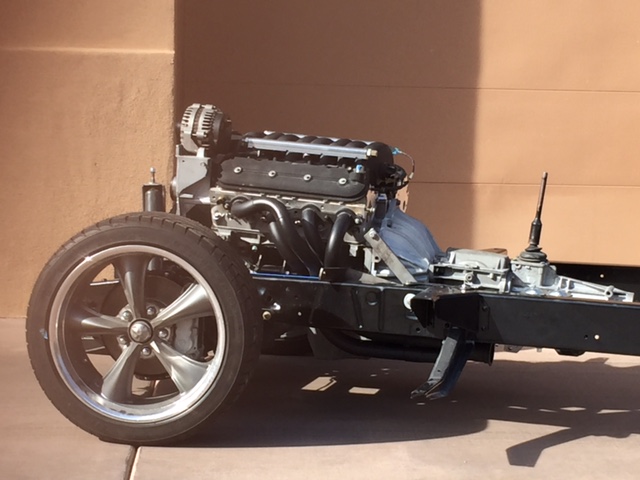
    I snagged a new Sanden compressor with a Vintage Air part number off of flea-bay for only a few bucks more than one of the Chinese Sandens. I paid myself my usual $5/hr to make my own bracket instead of buying one from Alan Grove or Vintage Air. Jeez I never learn.
    [​IMG]

    Front view of the Sanden compressor. Note I had to shave one of the un-used mounting tabs off of the Sanden to get it to clear the frame rail, but it does clear. Took a few trips to the parts store to get the right belt for the AC compressor. Used the factory belt tensioner. The AC compressor can be removed for maintenance without having to take anything else off the motor to get to it
    [​IMG]

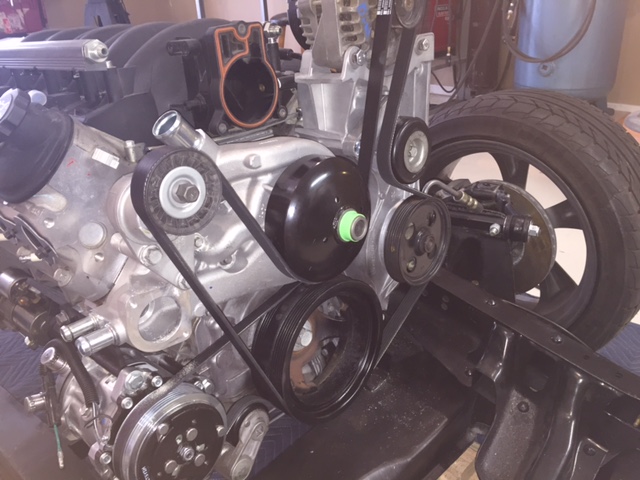
    The truck alternator sits up high on the motor and frankly, is kind of ugly. But for maintenance purposes, it is very nice. (have a 2002 GM truck with this setup, and the alternator failed about 30 miles from home last spring. Limped on the battery to an auto parts store and changed it out in the parking lot in about 15 min)

    [​IMG]
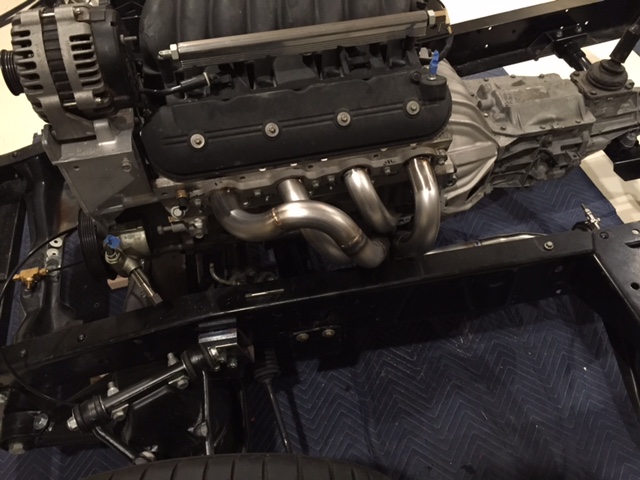
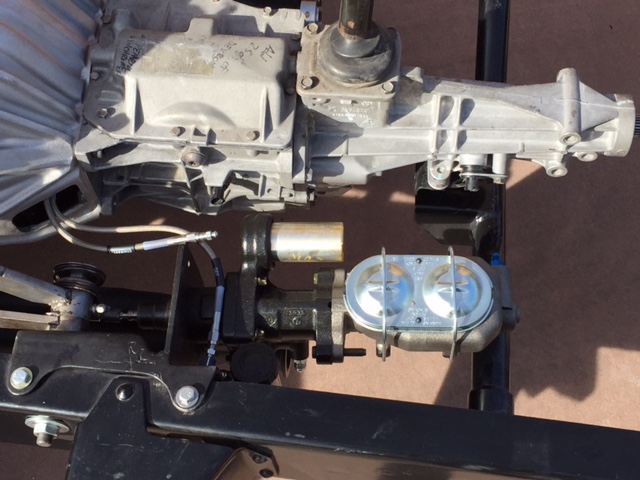
    Bought a idler relocation kit on flea-by for $15 to allow me to re-route the accessory belt to clear the LS1 intake and throttle body.

    The truck's water pump neck interfered with the throttle linkage on the LS1 throttle body, so I installed a new pump off of a 2009 Trailblazer that has the water outlet further away from the throttle body linkage. They say you can heat the steel neck in the truck water pump enough to soften the adhesive and rotate the neck to clear, but for maintenance purposes, I wanted to be able to change the pump in an Autozone parking lot if need be. (I'm going to need a cheat-sheet to remember where I got all these parts from to stuff in the glove-box just in case I ever get to drive this truck)

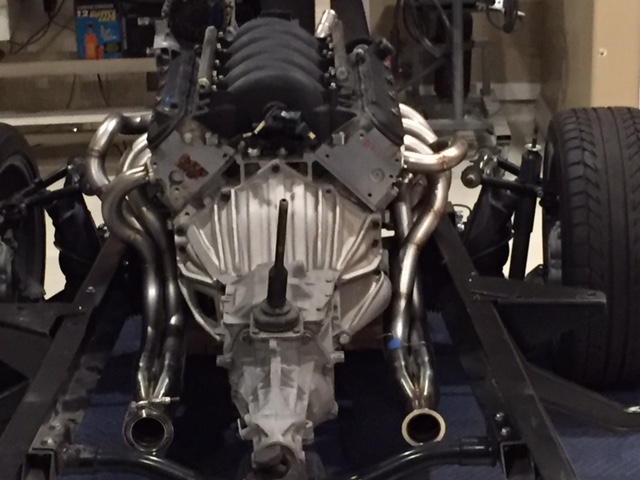
    Picked up a starter at the junkyard while I was in town a few weeks ago. Wanted to make sure I cleared the headers ok. Bought a dipstick and tube too, but when I looked on the aluminum engine block there's a boss, but no hole. This engine is out of a Trailblazer, and it seems they have the pickup tube in the pan (which I scrapped) and I'm going to have to drill the boss on the block and put in a dipstick from an iron block motor. (the orange thingy is just a Roloc sanding disk)
    [​IMG]

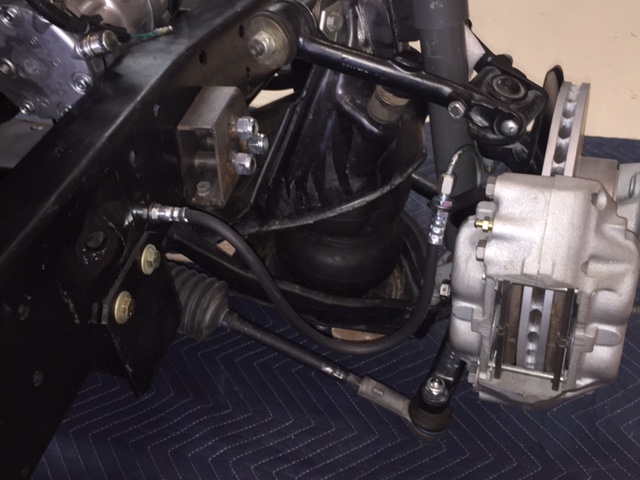
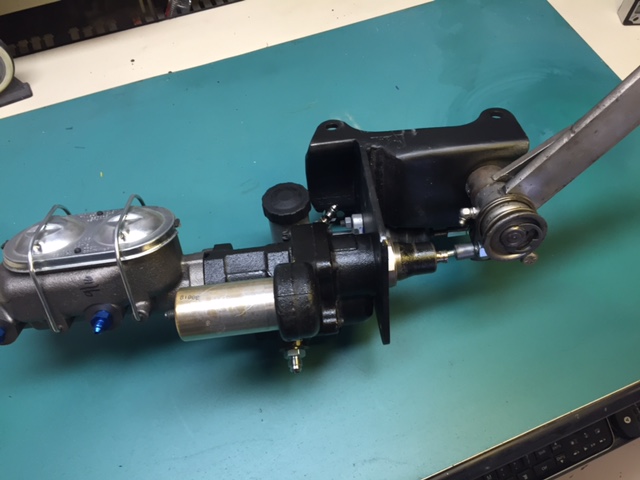
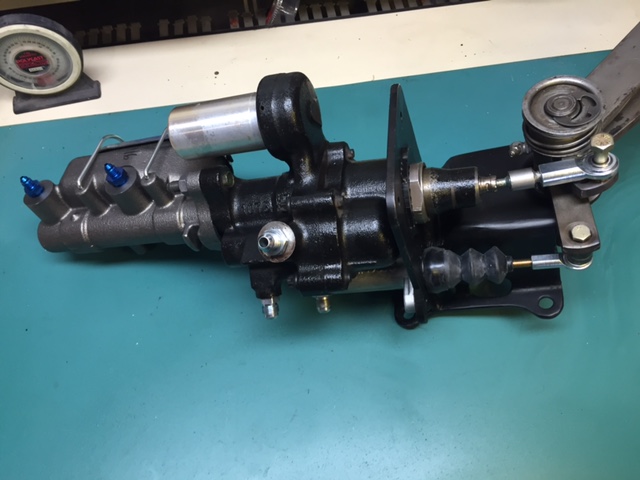
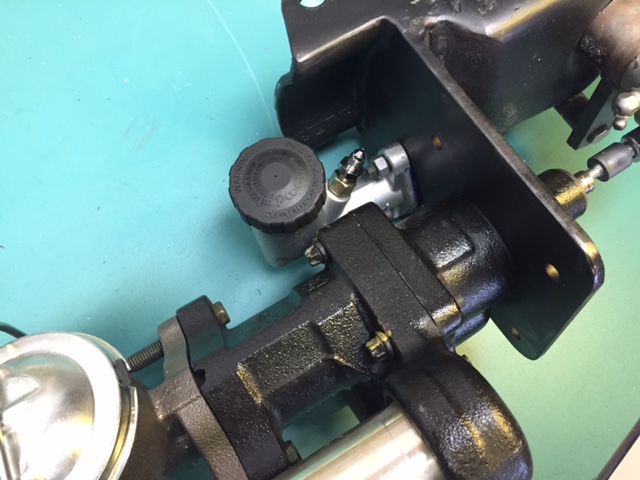
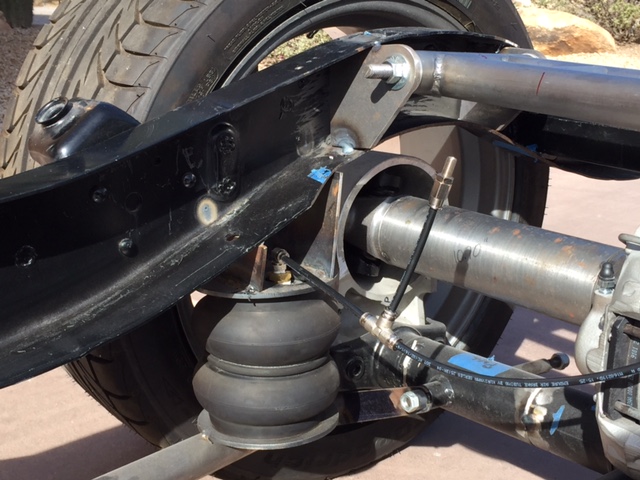
    Finished up the Jag front suspension. Rebuilt the calipers, new ball joints, new hoses. You can see the Slam airbags in there - still need to figure out where the slow leak is. There's an interesting thread on Bagged woes - The 1947 - Present Chevrolet & GMC Truck Message Board Network that talks about airbag height control. I need another science project like a hole in the head, but this sounds pretty cool.

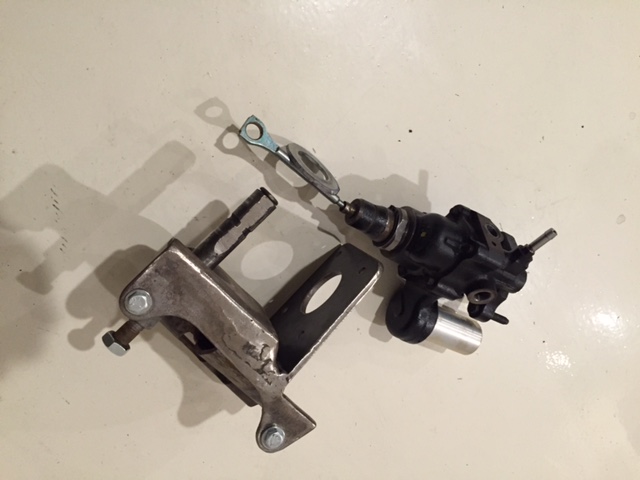
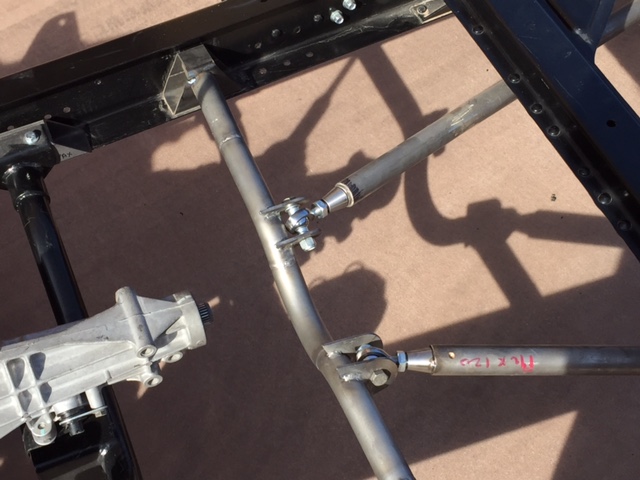
    Jag used a mix of SAE and metric brake fittings on their cars, and it took me a while to figure this out. My plan is to stitch the Corvette MC, Wilwood prop valve together with adapters and -3 AN brake lines.
    [​IMG]

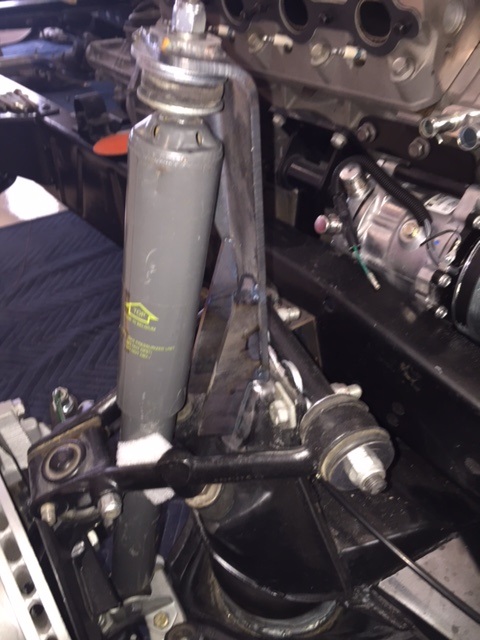
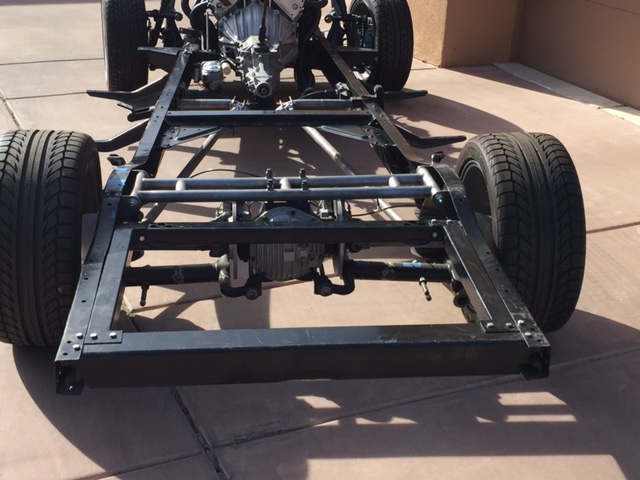
    Bought universal shock towers from Suicide Doors and adapted it to the Jag's IFS. I TIG welded them together with just short tack welds since I don't know how to MIG weld and will likely end up taking it somewhere to put a nice fat MIG weld in there. Going to try the Jag shocks with the airbags and see how they work. Will add another stiffener along the side to give it a little more rigidity
    [​IMG]

    After a couple of months of working on the truck after work, the wife is putting her foot down and says I have to get the painted truck parts out of my den, finish painting the baseboards in the house and finish painting the ceilings I'd started after I remodeled the kitchen - she says I have to finish the house by Thanksgiving. (pretty reasonable, actually). Layoffs rumored to occur week after next and a furlough for a week after that, so it looks like I'll have more time to work on my own projects, just a matter of degrees.

    Phil
     
  6. e015475

    e015475 Member

    Joined:
    Mar 13, 2014
    Messages:
    240
    Location:
    Show Low AZ
    Making some progress, so here's a short update..............

    Headers are done with the O2 bungs welded in. Had them ceramic coated black as I thought that'd be the best contrast against the colors in the engine bay. Welded on the cheap ebay merge collectors and they should be air-tight. Engine is out of the chassis again to replace the Trailblazer pan and oil pickup with a truck pan and pickup.

    [​IMG]

    The cab is still at the body shop. All the metal replacement and hole filling is done on the exterior of the cab and the cab is in Featherfill for blocking with 150 grit and a long board sander. The shop owner is pretty customer friendly and said if I wanted to do any of the work myself at his shop I was welcome to do so and he'd provide 'adult supervision'. Since I've got a few weeks of vacation this fall, I'm working in his shop three days a week till the end of the year. Most of the work is blocking the feather fill, and while I always enjoy learning new things, it is dusty, dirty work and I'll be glad when the cab is ready to go back on to the chassis for all the alignments before paint. Being there is helpful in keeping progress coming (I hope)

    (The pieces of paper stuck to the cowl with a magnet are patterns for covers for the door hinge plates. Mine are all beat to snot, and if anybody has any ideas on how to cover them, I'd like to hear from you)
    [​IMG]

    Lots of interesting things going on at the body shop. Here's an 'extended cab' 1929 Ford pickup being built. Powered by a SBC and believe will be full-fendered.
    [​IMG]
    I've never seen one of these before, and I'm kind of a LBC (little British car) nut. It is an 1950's MG coupe with a Bertone body called a MG Arnolt. Lots of rust damaged panels fabricated from scratch on an english wheel and gas welded into place. All the lower fenders, parts of the roof and the whole front end and brass grill (chromed, I think) made from scratch. Pretty fascinating process.
    [​IMG]
     
  7. 50 Chevy LS3

    50 Chevy LS3 Member

    Joined:
    Jan 14, 2013
    Messages:
    951
    Location:
    Indiana
    Thanks for the regular updates, Phil. I'm following your project with great interest. You do fantastic work.

    2009, Trailblazer waterpump... thats on my list now.

    Steve.
     
  8. e015475

    e015475 Member

    Joined:
    Mar 13, 2014
    Messages:
    240
    Location:
    Show Low AZ
    Short update.

    Been doing grunt-work at the body shop sanding out Featherfill on the cab and doors while Wyatt Tichenor (Tichenor Coach Works) does the skill intensive work and keeps me from running amuck. Here's one of the doors sanded out and ready for a second coat of Featherfill before the final urethane primer. Managed to bust a tap in the lower cover so I'll need to dig that out and put a riv-nut in. Planning on replacing the factory door cards with an aluminum cover - more on that next time.
    [​IMG]

    Cab is blocked out and a second coat of feather fill applied to the door jambs. The new firewall that lets the LS 5.3 sit back a little further in the chassis is done and in Featherfill for sanding/blocking
    [​IMG]
    Blue tape on the cab floor is where the cover goes for the hydroboost, master cyl and clutch cylinder. A little more detail on the new firewall-
    [​IMG]
    Have a painter and booth lined up for the first of the year. Plan is to have the cab, front fenders and hood on the chassis and all aligned to him end of December and he'll blow it apart, paint it, color sand then reassemble in January.
     
  9. 50 Chevy LS3

    50 Chevy LS3 Member

    Joined:
    Jan 14, 2013
    Messages:
    951
    Location:
    Indiana
    Fantastic looking metalwork, on that custom firewall. Looks like you will have a tight area for your feet, accelerator.
    I wish I had a good body man around here, to help move mine along. Or, just evenings at home, where I could move it along.
    Thanks for the update, Phil.

    Steve.
     
  10. e015475

    e015475 Member

    Joined:
    Mar 13, 2014
    Messages:
    240
    Location:
    Show Low AZ
    Thanks Steve.

    I wondered about that too. The accelerator pedal looks like it will fit fine, but I'd hoped to have a foot switch for the starter that looks like the original, but I don't think there's enough room.

    Good body men are reasonably easy to find around here, but someone who can do metal-work is much harder. Wyatt had a early 50s Chevy panel delivery in the shop last week that he'd replaced the smashed rear fender with one he'd made on an English wheel. Wish I had that talent, or at least live long enough to develop it. High hopes he'll finish the metalwork on my truck by the end of this year. Here's a link to some photos- https://www.facebook.com/pg/WyattsRodShop/photos/?ref=page_internal

    With some hesitation, I put my name forward at work for a 'voluntary separation' and hope that it'll be accepted and I'll have more time to work on my truck and other projects. Been working since I was 11 and quitting work seems so surreal.

    I imagine that a trucking business requires a lot of time away from home, family and projects - hope you find the time for a little R&R with your truck and will report progress here.
     
  11. 52wasp

    52wasp Member

    Joined:
    Jul 21, 2006
    Messages:
    672
    Location:
    Wilton, New Hampshire
    Phil,
    All good stuff! Like ALL of us trying to get some project time in, there just aren't enough hours in a day. I like the firewall! I considered mods to mine, but I am trying to keep the $$$ to a minimum.
     
  12. Blueflame236

    Blueflame236 Member

    Joined:
    Mar 29, 2008
    Messages:
    1,555
    Location:
    Norway
    Your doing a mighty fine job and its going to work for shore. I Have a question are there any speedometer gauges made for km plates instead of Mph `
    Where to buy them for a 1/2 ton truck ?


  13. e015475

    e015475 Member

    Joined:
    Mar 13, 2014
    Messages:
    240
    Location:
    Show Low AZ
    Steve - I checked the throttle pedal location the other day and it looks like plenty of room for my size 12s in there. Even enough room for a dummy starter foot pedal!

    Blueflame - I've never seen any gauge faces in KM/HR, but I'm here in the states and there might of been exports of this truck that had them. You might try Mother Trucker in Tucson, AZ and see if he's heard of such a thing. The guys over at the Stovebolt forum seem to know all the history on these trucks so you might try posting this question there too. I think I'd take my speedometer to a calibration shop and see if they could calibrate the unit to to KM/HR and live with the MPH markings knowing that the speedometer was really in KM/HR.

    Update - Been going to the body shop to work on my truck for a couple of days each week for about the last month. Plan to have the cab on the chassis in early to mid December. Working on the chassis at home and have the hydroboost mocked up - still a little fine tuning of the linkages but will wait to do that after the body is back on the chassis.

    Here's a shot of the hydroboost unit and the Corvette master cylinder. The hydroboost is off a Astro Van and I took the 15 degree bracket off of it and cut out the mounting flange and welded it to my bracket. Yea, I know - the hydroboost is upside down, but that's the only way I can get the clutch master onto the same bracket. The offroad guys on Pirate 4x4 say that the hydroboost doesn't care about orientation and up or down doesn't make any difference. Master is the 1.25" dia off a Corvette and should be big enough to tone-down the hydroboost assist a bit
    [​IMG]
    Here's the bottom of the Hydroboost. Installed AN fittings so I can run -6 hose to the reservoir and power steering pump. Little fine tuning of the brake pedal lever is needed (just tacked the arm on knowing I'd have to tweak it)
    [​IMG]
    Here's the detail of the clutch master- I have a Howe hydraulic throw-out bearing I'll have to set up for the clutch.
    [​IMG]
     
  14. 52wasp

    52wasp Member

    Joined:
    Jul 21, 2006
    Messages:
    672
    Location:
    Wilton, New Hampshire
    Phil,
    When I harvested my hydroboost from an Astro Van, I also took the brake pedal. The leverage ratio is different than our original manual-brake pedal. With power brakes, you do not need as much mechanical advantage. I have drawings all made up of each pedal and its ratio somewhere- but as I recall, you will need to lengthen the lever arm on the existing brake pedal arm to emulate the Astro Van leverage ratio. I also had to make a new plunger pin to get all the dimensional relationships between master and hydro correct (Wilwood master- yours will likely be different). Peruse my thread "Progress, however slow" for more info.

    Everything looks great!
     
  15. e015475

    e015475 Member

    Joined:
    Mar 13, 2014
    Messages:
    240
    Location:
    Show Low AZ
    Mike

    The Corvette master (it is a GM part) seems to bolt right up to the hydroboost, no problem, so I think I sidestepped the issue you had with the Wilwood

    I shortened the lever about 20% on the brake pedal arm to the booster, and picked a 1.125" diameter master so the hydroboost wouldn't be too 'twitchy' on the brakes. (The original Jag MC for the brakes I'm using was 7/8", so there's about a 60% increase in area for the hydroboost to work against) It is all kink of a guess right now as to whether the ratio is going to work out. Thanks for the tip - I'll look for your setup in your thread to see how you did it.

    But if you have any ratio calcs of the Astrovan hydroboost setup , I'd sure like to see them and see how mine compares
     
  16. vwnate1

    vwnate1 Member

    Joined:
    Jan 1, 2000
    Messages:
    11,643
    Location:
    AMERICA !
    RE: Separation from work :

    I retired in May of this year and since I'd been working from age 8 or so I was really scared :eek: .


    As it turns out I'm so busy I wonder how I ever had time to go to work for nine hours every day......:p .

    As long as you're able to live within your means you'll be fine .

    Watching you fastidious and inventive work is fascinating .
     
  17. e015475

    e015475 Member

    Joined:
    Mar 13, 2014
    Messages:
    240
    Location:
    Show Low AZ
    Thanks Nate,

    Waiting for over a month now to hear if they accept my 'volunteer' layoff - still nothing - hoping to hear in January now. Fingers crossed. If they say no I'll probably stick it out another year or so to finish some projects.

    Hoping I have the same experience as you in retirement - I like to be busy. Having a lot of fun working at the shop getting my truck ready to paint. Lots of sanding and a bad case of tennis elbow from repetitive motion.
     
  18. e015475

    e015475 Member

    Joined:
    Mar 13, 2014
    Messages:
    240
    Location:
    Show Low AZ
    Rolled the chassis out of the shop for the first time in while. Getting ready to take the chassis down to Sierra Vista to have my brother do the MIG welds on the rear suspension and the shock towers on the front end (i'm not very good a MIG welding and only have a 115 volt machine_
    [​IMG]
    Finished the cross-member that holds the front of the arms that support the airbags
    [​IMG]
    The final (hopefully) airbag setup for the Jag IRS
    [​IMG][/IMG] [​IMG][/IMG] [​IMG]
    Installed the cradle for the rear gas tank. Have a junk early Camaro tank to trial fit and see if I can get my gas filler under the rear license plate
    [​IMG]
    Hydroboost and master cylinder are in. The fittings are a little close to the header - will either have to insulate the hose with a fire-sleeve or install a heat shield - or both. Howe hydraulic clutch is set-up and in. Brake lever clears headers by about 3/16" - pretty close.
    [​IMG]
    Truck cab is in final coat of urethane primer and ready to be sanded with 400 wet or dry prior to topcoat, doors too. Front fenders and running boards will get final urethane coat in the next week surround still need to be blocked.
    [​IMG]
    New firewall has been blocked out and is ready for urethane primer and 400 grit wet sand
    [​IMG]
    Other that that, it's been pretty quiet around here
     
  19. vwnate1

    vwnate1 Member

    Joined:
    Jan 1, 2000
    Messages:
    11,643
    Location:
    AMERICA !
    Wow ~ that's a LOT of hard work and looks good too ! #smile# .
     
  20. Zig

    Zig Member

    Joined:
    Oct 14, 2006
    Messages:
    4,860
    Location:
    Pittsburg KS
    Absolutely off the hook!
     

Share This Page