-
We have upgraded our forum software! See here for details.
You are using an out of date browser. It may not display this or other websites correctly.
You should upgrade or use an alternative browser.
You should upgrade or use an alternative browser.
Progress, however slow... but isn't it about the JOURNEY?
- Thread starter 52wasp
- Start date
52wasp
Member
Pictures 5/16/2014
Hey All,
Thanks for being so patient as I work thru this project. Here's a stack of pictures to peruse.
RH A-pillar

Cab, rear

the doors (not the band)

new floor

lh A pillar

lh cab corner

rh cab corner

lh seatbelt mount, bottom

rh seatbelt mount, top

my new (ok, lightly used) all-aluminum L33 5.3 Liter V8

AND... I stopped by the shop today, the cab is in body filler! Seems as if the old girl was used to haul firewood in a past life. And she was loaded with firewood by a BLIND person... Greg (my brother) spent quite some time chasing dents in the cab. He has applied an ever-so-thin coat of filler to the afflicted areas.
AND we worked on the Hydroboost mount last Friday (plasma cutter- my new best friend), should have all the mounting detail done tomorrow. I will have pictures of more progress soon.
I can say boxing the rear half of the (S10) frame will be CAKE with the plasma cutter available to make stock. Weight reduction holes everywhere else in the frame should be a breeze too.
I cannot describe how happy I am with real, actual progress after so long. 8 years this truck has been with me, and I actually see a ray of light at the finish line (albeit thru a telescope!).
Please let my in-process pictures be inspiration to all of you who (like me) have looked at your AD in her unfinished condition for seemingly forever.
Hey All,
Thanks for being so patient as I work thru this project. Here's a stack of pictures to peruse.
RH A-pillar
Cab, rear
the doors (not the band)
new floor
lh A pillar
lh cab corner
rh cab corner
lh seatbelt mount, bottom
rh seatbelt mount, top
my new (ok, lightly used) all-aluminum L33 5.3 Liter V8
AND... I stopped by the shop today, the cab is in body filler! Seems as if the old girl was used to haul firewood in a past life. And she was loaded with firewood by a BLIND person... Greg (my brother) spent quite some time chasing dents in the cab. He has applied an ever-so-thin coat of filler to the afflicted areas.
AND we worked on the Hydroboost mount last Friday (plasma cutter- my new best friend), should have all the mounting detail done tomorrow. I will have pictures of more progress soon.
I can say boxing the rear half of the (S10) frame will be CAKE with the plasma cutter available to make stock. Weight reduction holes everywhere else in the frame should be a breeze too.
I cannot describe how happy I am with real, actual progress after so long. 8 years this truck has been with me, and I actually see a ray of light at the finish line (albeit thru a telescope!).
Please let my in-process pictures be inspiration to all of you who (like me) have looked at your AD in her unfinished condition for seemingly forever.
Bill Hanlon
Member
Nice metal work Mike.
52wasp
Member
metal work
Bill,
Thanks. I cannot take any credit for the metal work, that is ALL my brother and my Dad. Dad ran County Auto Restoration for 30 years, and just retired a year ago. Greg worked under Dad's tutelage for around 15 years, and took over the business.
While a "tiny" shop (2-car garage small), they have consistently turned out AACA trophy-winning restorations. Greg has since relocated to a larger space, and Dad comes by to "supervise" on occasion. His metalwork on the passenger-side door was a Christmas gift to me.
Outstanding Work !
That's really impressive to see .
FWIW , ' blind ' wasn't the problem , the basic fact that it was a working tool was why they just threw the firewood (or brake drums , haybales , milk cans , pea gravel etc.) in the general direction of the bed .
That's the lot in life of old light duty trucks .
.
That's really impressive to see .
FWIW , ' blind ' wasn't the problem , the basic fact that it was a working tool was why they just threw the firewood (or brake drums , haybales , milk cans , pea gravel etc.) in the general direction of the bed .
That's the lot in life of old light duty trucks
.50 Chevy LS3
Member
Wow!
Mike, VERY NICE, I would like to see more pictures. I'm curious about how you guys installed the complete floor in your truck. Mine is done and I'm real happy with the fit of the floor and the doors.
Please keep us updated, I'm real interested in your progress.
Thanks for the link to the engine drive/acc. brackets!
52wasp
Member
brake pedal/pivot/hydroboost mount DONE
Hello all,
VERY productive day yesterday
Hydroboost mounted to bracket, viewed from the rear (master cylinder is not on yet)

another shot same

view of brake lever arm, moved 3" outboard (actual pedal will be moved 1-1/2" inboard on curved arm for a net 1-1/2" move), the hammer is holding the lever arm up for the photo

view from outboard

made a strut rod out of 3/8" rod, heated and flattened ends for fastening.

this is the box which holds the lever arm relative to the booster, all burned in. Weight reduction holes to follow once all the fastening is complete.

Enjoy!
Hello all,
VERY productive day yesterday
Hydroboost mounted to bracket, viewed from the rear (master cylinder is not on yet)
another shot same
view of brake lever arm, moved 3" outboard (actual pedal will be moved 1-1/2" inboard on curved arm for a net 1-1/2" move), the hammer is holding the lever arm up for the photo
view from outboard
made a strut rod out of 3/8" rod, heated and flattened ends for fastening.
this is the box which holds the lever arm relative to the booster, all burned in. Weight reduction holes to follow once all the fastening is complete.
Enjoy!
SinclairChevy
Member
Mike,
Looks like some dandy fabrication work! Thanks for the update on your progress, especially the photos and detailed descriptions of your work. Keep 'em comin'.
Damon
Looks like some dandy fabrication work! Thanks for the update on your progress, especially the photos and detailed descriptions of your work. Keep 'em comin'.
Damon
Nice Work !
Mike ;
I always like to see pictures of professionally done works , they help others figure out what to do as well .
Having had the V - Belt snap on a brandy new Chevy pickup with hydroboost whilst 'rounding a corner , I'm no fan of it but I know they're great when they're working .
Mike ;
I always like to see pictures of professionally done works , they help others figure out what to do as well .
Having had the V - Belt snap on a brandy new Chevy pickup with hydroboost whilst 'rounding a corner , I'm no fan of it but I know they're great when they're working .
52wasp
Member
hydroboost
Nate,
Thank you for your concerns regarding hydraulic/hydraulic brakes (vs vacuum/hydraulic)... to those concerns I offer the following:
> nearly all GM diesel pickups and 2500/3500HD's have hydroboost (there may be an exception, but)
> many OEM forced-induction vehicles utilize hydroboost (80's turbo Buicks for example), as well as NA vehicles with underhood clearance issues (late model Mustangs come to mind)
> ALL the GM Astro/Safari minivans feature it.
Not to mention I have never heard (besides you) of anyone losing a belt, unless there were engine RPMs well beyond the design parameters present. And V-belts fell out of favor in... '86?
The accumulator built-into the hydroboost unit will support at least 2 stops with full assist, before becoming discharged.
It is a viable system, present in tens of thousands (millions?) of vehicles, the vast overwhelming majority of which go through their entire service life providing safe, dependable braking assistance. Can you imagine how the Media would crucify GM if soccer Mom's in their Astro Vans were piling into crowds of people because their brakes failed?
In the selection and re-implementation of various subsystems within my project vehicle (Penny), I have made certain I understand their ORIGINAL implementation, and have not deviated from that intent in my application.
i.e.
Tire sizes/gear ratios/engine RPM/road speed...
"Critical speed" parameters for the custom driveshaft...
Master cylinder/proportioning valve/brake bias
Mechanical advantage of the brake pedal against power assisted brakes
Installed engine angle/pinion angle relationship
Seat belt anchor points and supporting structure below
telescoping feature in the steering column
These are but a few of the concerns present in the Endless pages of math and drawings/diagrams to convince MYSELF that when I point Penny in a given direction on public roads that I do not endanger MYSELF, my PASSENGERS, or OTHERS I share the road with.
Hydroboost
All valid points .
As you may know , I work for a large Municipality so we had thousands of these so equipped light duty trucks and more than once I had the same issue : a loose / worn out drive belt so when you hit the brakes in a turn , the brakes simply stopped working and the steering wheel jerked out of your hands and it tried to unwind to straight ahead position .
.
I am keenly aware that GM made millions of hydroboost equipped vehicles that never had any problems .
IMO , coupling brakes and steering to the same power source is poor engineering .
All valid points .
As you may know , I work for a large Municipality so we had thousands of these so equipped light duty trucks and more than once I had the same issue : a loose / worn out drive belt so when you hit the brakes in a turn , the brakes simply stopped working and the steering wheel jerked out of your hands and it tried to unwind to straight ahead position
.I am keenly aware that GM made millions of hydroboost equipped vehicles that never had any problems .
IMO , coupling brakes and steering to the same power source is poor engineering .
52wasp
Member
Stay tuned...
Tomorrow we mock front-end sheetmetal to determine trimming required of inner fenders (for A-arms), location of running-board mounting brackets, and what needs to be done to make the stock bumper mount to the S10 Frame.
I have fresh batteries in the camera.
Today's update: The cab is very close to PRIMER TIME... all the pieces/parts which needed to be moved to accommodate the brake pedal relocation (same felts will be used- like stock) on the cab have been completed. The adapter plate to tie the Hydroboost to the Wilwood master is designed and drawn, with a copy of the drawing slated to hit my buddy's machine shop next week. A little math and a new drawing (for the rod to actuate the master) will be ready for him as well.
Excited? yes, I am. Good thing I have had YEARS to think about all this stuff.
Don't worry Zig... I know we talked about "whoever finishes first has to drive to the other guy's house"... and you have been in the lead for quite awhile. But I am CATCHING UP!
Zig
Member
Never fear, Mike~
Sorry to say, but I'm pretty sure it will be you rolling before me.
My daughter loves camping and our only trustworthy vehicle for longer road trips is our Dodge Caliper. But imagine the three of us plus one of her buddies + camping gear loaded into that little car. Not good. Now on top of that, I have <got> to replace our deck and rebuild our fence behind our house. (part of the original, 22 year old fence I first put up) How the hell do you haul debris or lumber in a Caliper~
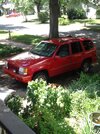
Sooo, I went back to my favorite used car dealer and checked on something more practical for our needs. I had bought our Jeep from him back in 2001. It was never in a garage, and in such good shape still, he took it back on trade in. He also happened to have this little jewel of a fishing rig for an unbelievably low price. I had to get it, too. Now a cheap 7 hp motor, and camping yjust got even more memorable!
So, Mike~ With all the extra debt I just incurred, the money I need to get my truck rolling just got sidetracked. Again.
Life is still great and I know that some fine day (if I live long enough) I will drive that truck of mine out of it's hiding place.
BTW, is it just me, or does it seem like the old GMC Manly grille and the '54 Chevy grille are showing up on the faces of the newer trucks?
Sorry to say, but I'm pretty sure it will be you rolling before me.
My daughter loves camping and our only trustworthy vehicle for longer road trips is our Dodge Caliper. But imagine the three of us plus one of her buddies + camping gear loaded into that little car. Not good. Now on top of that, I have <got> to replace our deck and rebuild our fence behind our house. (part of the original, 22 year old fence I first put up) How the hell do you haul debris or lumber in a Caliper~
Sooo, I went back to my favorite used car dealer and checked on something more practical for our needs. I had bought our Jeep from him back in 2001. It was never in a garage, and in such good shape still, he took it back on trade in. He also happened to have this little jewel of a fishing rig for an unbelievably low price. I had to get it, too. Now a cheap 7 hp motor, and camping yjust got even more memorable!
So, Mike~ With all the extra debt I just incurred, the money I need to get my truck rolling just got sidetracked. Again.
Life is still great and I know that some fine day (if I live long enough) I will drive that truck of mine out of it's hiding place.
BTW, is it just me, or does it seem like the old GMC Manly grille and the '54 Chevy grille are showing up on the faces of the newer trucks?
Attachments


ol' chebby
Member
- Joined
- Dec 11, 2007
- Messages
- 3,167
- Reaction score
- 27
- Location
- Charlotte,NC
- Website
- www.rpettycustommurals.com
That thing got a Hemi? I love mine. 06 Ram quad cab. Great truck. Pulls everything I need it to. If you own a house, you need a truck......
Zig
Member
Indeed~ 5.9L so the gas mileage isn't too hot, but boy-oh-boy I love the rumble. I can't wait until it brings a V8 home for my GMC. Of course, a concrete floor in my garage would probably be first...
52wasp
Member
Zig,
I comPLETEly understand the "sidetracked" thing. I force myself to put a little aside every paycheck for Penny, or she'll just plain never get finished.
And be thankful you aren't in the road-salt capital of America... I just replaced my 2004 GMC pickup, as the commuting for 10 years on one of the busiest road in New Hampshire (and I think the most salted) took it's toll on the old girl. Lets hope the new 2014 GMC sitting in my driveway serves me as well as the old one did.
We put in a FULL day on Penny Friday, had the front sheetmetal ON! Of course it was just for fitment, but it looked like a whole truck! Had to do some minor trimming of the inner fenders etc., for clearance to the S10 frame. Mocked up the parking brake assembly, and trimmed the hydroboost mount to clear it as planned.
Pics are on my brother's camera, will post soon.
My youngest daughter graduates from High School today. TIME FLIES!
Zig
Member
Congratulations, Mike! Time flies, for sure! Mine's moving to Middle School this year~ PMS.
They didn't like that, so they made it PCMS. (Pittsburg "Community" Middle School)
Pictures, pictures, pictures, please...")
They didn't like that, so they made it PCMS. (Pittsburg "Community" Middle School)
Pictures, pictures, pictures, please...
52wasp
Member
how does she look?
Here's a few shots of Penny with sheetmetal on...


All the trimming and fitting of old sheetmetal to new frame is on the "inside", and isn't visible in the pics. I rolled one of the wheels into place in front for the picture.
Enjoy!
Here's a few shots of Penny with sheetmetal on...
All the trimming and fitting of old sheetmetal to new frame is on the "inside", and isn't visible in the pics. I rolled one of the wheels into place in front for the picture.
Enjoy!
Last edited:
50 Chevy LS3
Member
Mike, in picture 3 above,(the one with the hammer) it apears to me you managed to get the engine in without altering the firewall or toeboard at all. Is this correct? Did you have to move the radiator forward at all?
Also, what holes in the firewall did you fill, and what ones did you use?
Where did or will you mount engine and trans. controller?
I spoke with some guys from GM performance at Goodguys, Indy last weekend and saw their "connect and cruise" kit. They say I only need two holes through the firewall, one about 1" and one about 3/4" to run the wires from the cab interior to the engine. I'm thinking of mounting the ECM inside high on the firewall.
Sorry for all the questions, things seem to be movin' fast for you now. I seem to be stuck on jacks.
52wasp
Member
ask away!
Steve,
DON'T be sorry about the questions... thats why we're HERE. I am sure I have asked my share (and perhaps many more than that).
I did NOT alter the firewall (passenger side coil mount bracket has finger-thickness clearance, same with the steel fuel-rail guard). We established the original purpose of each hole in the firewall, and filled the ones which were no longer needed. Easier to ADD a hole later than to fill one.
>more info 6/11 7pm: most of the holes left un-filled were for: barbed pad retainer clips (many), cowl vent drain hole, strut rod mounting, column bracket mounting, harness feed-thru.
I DID alter the toe board as follows:
Relocated brake pedal (to clear driver's side exhaust manifold and optimize gas-to-brake pedal distance in the cab)
Filled in stomp-starter hole and clutch hole
Trimmed the flange @ toe board/floor to clear transmission for finger-thickness clearance, and massaged the transmission inspection cover slightly where it rests on the toe board.
PCM location: TBD. I have an LM7 (5.3L, cast-iron block, 285hp) from an '04 Express van (yes, I have have an aluminum block motor now, but the interface will still be VAN). There are 2 BIG DIFFERENCES with a VAN motor:
1. Vans had a CABLE THROTTLE until 2006 (pickups and suv's had switched to electronic throttle years earlier). No electronic pedal and TAC module required.
2. Harness length from engine to PCM is greater, allowing more flexibility regarding PCM mounting location. The PCM is weatherproof and was originally mounted IN the engine compartment, so my PCM may end up under the hood.
3. During a prior mockup, I was able to mount the original radiator in the stock location, and the fan didn't hit (but it was close). I do not intend to utilize electric fan(s).
There are more (subtle) mods coming... but we (all) need to wait a week and a half til I get to work in the shop again. Steve, let ME make all the mistakes NOW, so you can avoid them later!
Last edited: