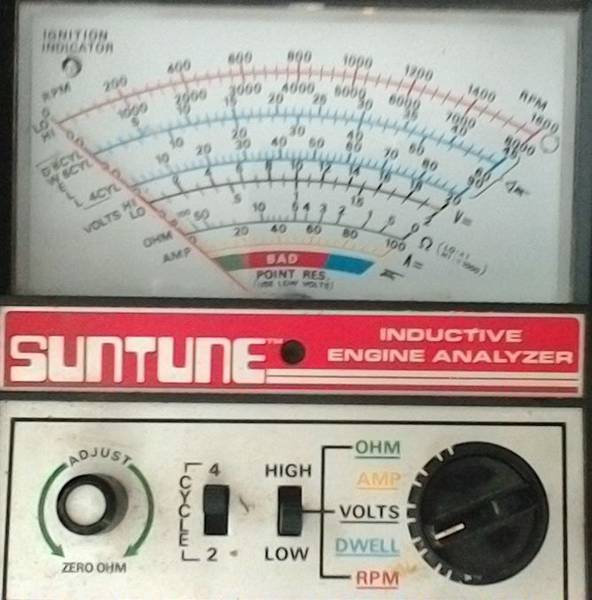
Spit, Sputter, and #$%@!!!

Discussion in '1947-1954' started by Zig, Jun 30, 2015.

  1. Zig

    Zig Member

    Joined:
    Oct 14, 2006
    Messages:
    4,860
    Location:
    Pittsburg KS
    Alright~
    So I went outside and fiddled around some more.

    I then sat the fiddle down and tried something.

    I fired the truck back up, and sure enough, it was reading right at 17", but the idle that I had it at sounded just a tad slow to me. (the engine temp is warmed up)
    So, I pulled out just a tad on the choke to pick the RPMs up just a bit.
    Just that little bit ran the needle up to the green on the gauge that says, "Normal".
    I thought~ AhHA. and went out an turned the throttle screw in just enough to hear the RPMs go up just a bit more, then went and pushed the choke in to drop it back down to the way it was when I got it to Normal, and that's what it still reads.

    So, I figured I'd run it on up to where I have problems. The gauge held pretty steady until it got to the misfire part. As it started getting rougher, the needle started falling farther, down to around 12".

    The only thing is, I don't know if that is normal or not.

    Thanks again for ideas to check!
     
  2. Tubby

    Tubby Member

    Joined:
    Oct 12, 2012
    Messages:
    100
    earlier Bill posted what your RPM should be set at. Kinda hard to do by ear but you will be able to soon.


    What I like to do is install my vac gauge

    start truck

    set my idle...in my case 450 to 500RPM

    set my timing on the ball

    then I look at the vac gauge

    advance my distributor to Max reading. (around 20)

    tighten distributor body collar

    recheck - reset idle.

    I then turn my mixture screw in till the engine stumbles..then back it out to max vac reading.

    all this with the choke off

    Im not sure about GMC but most trucks run advance probably around 6 degrees.

    check your shop manual...all the steps should be in there.

    once your able to time it, run it good and warm it up- then you will adjust your valves.

    I would not worry about a slight miss right now.
     
  3. Bill Hanlon

    Bill Hanlon Member

    Joined:
    Jun 4, 2002
    Messages:
    2,729
    Location:
    Fredericksburg TX
    Not knowing what your idle speed is ...
    Not knowing if you removed the vacuum advance line ...
    Not knowing if you plugged the vacuum hose ... (may not be needed, but wouldn't hurt)

    ... I'd say use Tubby's method sounds pretty good.
     
  4. Bill Hanlon

    Bill Hanlon Member

    Joined:
    Jun 4, 2002
    Messages:
    2,729
    Location:
    Fredericksburg TX
    Funny thing is, if it happened the way you said (saw the ball first, then the U|C), your timing was ADVANCED more than it should have been UNLESS idle speed was real high. Usually makes for hard starting as the spark happens too soon causing "kick back" against the starter.


    So you've now set timing at TDC, not 5 degrees before TDC. Plus, unless you've reduced idle speed to below 400 RPM (I doubt you did) the distributor had already started adding mechanical advance, so you are probably really set to a few degrees AFTER TDC. Not the best place for an engine to perform well.

    Don't mess with the timing any more until you read my next comment.

    Next comment. If you leave the "distributor body collar" lock screw tight, you can loosen the "manual advancement" screw, adjust timing towards A (or D), lock the screw back down, test how the new setting effects your engine's performance and be confident in your ability to return timing to a known place (the 0 mark between D and A) for later experimentation. If I remember correctly, the distance from the "0" mark to fully "A" is about 10 degrees of advance.
     
  5. Zig

    Zig Member

    Joined:
    Oct 14, 2006
    Messages:
    4,860
    Location:
    Pittsburg KS
    Answers to questions.

    Vacuum line remained hooked up the whole time.
     
  6. Zig

    Zig Member

    Joined:
    Oct 14, 2006
    Messages:
    4,860
    Location:
    Pittsburg KS
    Since I don't have anyway of finding RPMs accurately, I'm thinking the idle is going to be pretty slow if it's only 450 to 500. (understanding it could turn 2,000 RPMs normally, running down the road.

    So what I did was dial mine down as slow as it would go and not sound like it was going to just quit soon.

    I tried loosening the bolt that holds the manual adjust part. Moved it to advance quite a bit. Didn't help
    Moved it to retard, didn't help.
    Back to zero and the vacuum gauge/ability to start nicely all looked good again.

    If I am reading the manual correctly, the only GMC block to be timed with the ball is the 270.
    Is this not correct?

    Thanks again for the ideas!

    I'm going to find something that will show me RPMs, so I don't have to guess.
     
    Last edited: Jul 5, 2015
  7. Zig

    Zig Member

    Joined:
    Oct 14, 2006
    Messages:
    4,860
    Location:
    Pittsburg KS
    Little by little~

    So I ran the idle mixture screw in until the engine started to sound like it would like more fuel, and then took it half turn by half turn until the vacuum reading was almost 20. It seemed not want to go that far.

    But the little bit that did for the overall performance was it is allowing me to more sharply rev the engine without hesitation *or* backfire through the carb.
    (which it did often, if not every time before)

    Now with this adjustment done, I guess I will recheck the timing tomorrow. Before I screw any more with the timing, I am going to see if I can purchase a flat blade screw driver end that is made for a 1/4" socket wrench. There is not a screwdriver in my arsenal that fits for this application. However, A flat blade that fits and extension for 1/4", and I would happily do this adjustment over and over.
     
  8. Zig

    Zig Member

    Joined:
    Oct 14, 2006
    Messages:
    4,860
    Location:
    Pittsburg KS
    Then again, if I would just follow directions...

    I went back and saw where Tubby had said to set the timing to 20, and THEN adjust the mixture screw...

    Well, as I say, tomorrow is another day.
     
  9. Tubby

    Tubby Member

    Joined:
    Oct 12, 2012
    Messages:
    100
    its kind of a dance


    I think the tach will really help you dial this in.
    you had mentioned a miss before, but I didnt catch the part about backfire.
     
  10. Bill Hanlon

    Bill Hanlon Member

    Joined:
    Jun 4, 2002
    Messages:
    2,729
    Location:
    Fredericksburg TX
    When setting timing, go ahead and disconnect vacuum advance and plug the line so there won't be a vacuum leak. Shouldn't make a difference, but it won't hurt. If left hooked up AND idle is too high, vacuum advance will take place and mess up the measurement.

    Also, you really need to get the idle speed down for proper timing setting. If no tach is available, try counting flashes from the timing light. 360 RPM is 3 flashes per second or 15 flashes in 5 seconds.
     
    Last edited: Jul 5, 2015
  11. Zig

    Zig Member

    Joined:
    Oct 14, 2006
    Messages:
    4,860
    Location:
    Pittsburg KS
    Will do, Bill.

    Tubby~ The backfire was (and always has been) through the carburetor.
    The backfire part was always when I tried to (kind of) "punch it". I can do that now, and it handles it much better.
    Truly, the only problem I have is that it seems to forget what cylinder is supposed to fire next, once you speed up the RPMs.
     
  12. Zig

    Zig Member

    Joined:
    Oct 14, 2006
    Messages:
    4,860
    Location:
    Pittsburg KS
    Cool!

    Guess what I'll be checking 1st thing tomorrow morn!
     
  13. Bill Hanlon

    Bill Hanlon Member

    Joined:
    Jun 4, 2002
    Messages:
    2,729
    Location:
    Fredericksburg TX
    Check your PMs Paul.
     
    Last edited: Jul 5, 2015
  14. Zig

    Zig Member

    Joined:
    Oct 14, 2006
    Messages:
    4,860
    Location:
    Pittsburg KS
    Hmmm...

    I wonder what Bill's up to now?
     
  15. Bill Hanlon

    Bill Hanlon Member

    Joined:
    Jun 4, 2002
    Messages:
    2,729
    Location:
    Fredericksburg TX
    Mostly no good.
     
  16. Zig

    Zig Member

    Joined:
    Oct 14, 2006
    Messages:
    4,860
    Location:
    Pittsburg KS
    Very interesting...

    So I went back out and tried setting the timing at the rate of flashes Bill had mentioned. (I was off on the high side just a tad, however)
    Found one problem~ You really have to loosen the clamp screw to get just the distributor to move. The problem today was, I thought I was just turning the distributor, when in fact the arm(?) that connects to the vacuum advance armature was moving as well.
    I'd get the BB lined up, tighten the screw while holding the body, let go once tightened, and the BB would disappear as the RPM went down.

    SO! I loosen the screw completely and tried it again.
    Success! BB spot on. (Oh, and 20" on the vacuum gauge)
    So next step was to see if this helped the operation at higher RPM.
    It didn't.
    It seemed like the dizzy didn't match the movement of the increase in RPM, but as a one man operation, it's hard to tell.
    So, I did something Bill had mentioned, and that was remove and block the vacuum advance line.
    I did that.
    Then I ran the engine like before.
    It started up just fine, could handle the slight revs beautifully, but as I started slowly increasing the RPM, the same amount of random sputters started to happen.
    It makes no difference if the line is hooked up or not.
    BTW, the dizzy showed (no) signs of moving at all with the line blocked. I just wish I had thought to keep the vacuum gauge on it to see what it read.
    It seems like maybe it is getting a vacuum leak from somewhere else?
    I have a new manifold gasket that I put on it when I repainted the engine, and I had really doused the intake ports with starting fluid, but heard no sign of that speeding up the works~

    :confused:
     
    Last edited: Jul 7, 2015
  17. Bill Hanlon

    Bill Hanlon Member

    Joined:
    Jun 4, 2002
    Messages:
    2,729
    Location:
    Fredericksburg TX
    I've been running this problem around in my feeble brain for two days now and have come up with a possible problem that will cause the symptom.

    I'm going out on a limb here. First because I'm "logically" guessing at what the problem is, and second because I'm likely to get quite a bit of negative feedback from others on the forum on the next two sentences below.

    ----------------------------------------------------------------------------------

    In the electrical world, point gap doesn't matter. Neither does dwell. What matters is that the coil has sufficient time to saturate when the points are closed so that when the points open a nice fat spark occurs.

    The amount of time that the points are closed depends on two things. One is the gap. We can measure the gap with a feeler gauge or indirectly with a dwell meter. The second thing that varies the amount of time the points are closed, and therefore coil saturation, is engine RPM. The faster the engine is turning, the less time the coil has to saturate. This is why points equipped ignition systems are often replaced with electronically switched systems such as HEI, MSD, magnetos, etc. in performance applications.

    So I'm guessing that the problem is insufficient spark at higher RPM.

    Could be because points are not closed long enough at higher RPM. If this is the problem a dwell meter would show a lower than the specified 34 degree reading. This could be corrected by decreasing the point gap which would increase the time the points are closed. Santa Clause delivered a dwell meter to Zig today. Should have results of this experiment tomorrow.

    Or, the amount of current flowing in the primary winding of the coil could be less than it should. Zig is using a NAPA "12 volt, no ballast required" # 905 coil. I happen to have the same coil on my 228 and I've made a few measurements that I'd like Zig to duplicate.

    1. Turn the key OFF. Remove the wire from the - post on the coil. Connect the Red alligator test lead from your new toy to the + post on the coil. Connect the Black alligator test lead to the - post on the coil. Set the function selector on your new toy to "OHM" and the "High/Low" switch to low. Read the OHM scale on the meter. Mine (probably more accurate than yours) reads 4.1 OHMs. What does yours read?

    2. Remove the Black alligator test lead and connect it to one of the valve cover hold down bolts. Remove the Red alligator test lead. Set the function selector on your new toy to "AMP" . Set the "High/Low" switch to "High". Turn on the ignition switch, but do not attempt to start the engine. Touch the Red alligator test lead on the - post of the coil while observing the "AMP" scale on the meter. Try not to leave the Red lead touching the coil - for more than a second or two. What does yours read? Mine (again more accurate than yours) reads 2.86 AMPs.

    3. Turn off the key. Remove the Red lead. Leave the Black lead attached to the valve cover bolt. Reattach the wire removed from the coil - post that had been removed in step 1.

    4. Set the function switch on your new toy to "VOLTS" and the "High/Low" switch to "High". Attach the Red lead to the coil + post. Turn on the ignition switch, but do not attempt to start the engine. What is the reading on the "VOLTS HIGH" scale on your meter. Mine reads 11.5 VOLTS.

    5. Remove the Red lead from the coil + post and connect it to the coil - post. The ignition switch should still be on.

    6. If the meter reads less than half of step 4 results, continue to step 7. IF (big IF) the meter reads about the same as in step 4 above the points are open, but for step 7 we need the points closed. So bump the engine over by hand until the meter reads less than half of step 4 results. When it does, the points are closed.

    7. Move the "High/Low" switch to "Low". What is the reading on the "VOLTS LOW" scale? Mine is 0.06 Volts. This also coincides with the "POINT RES" scale GREEN (i.e. GOOD) indication. Turn the ignition switch off.

    One other question: What is your recipe for "bacon bombs"?
     
    Last edited: Jul 9, 2015
  18. 52wasp

    52wasp Member

    Joined:
    Jul 21, 2006
    Messages:
    672
    Location:
    Wilton, New Hampshire
    NO negative feedback here...

    Bill,

    Obviously, you have some "pull" with Santa... nice job.

    As I look at your step-by-step help, I consider how much time and effort you have put in, and I can't help but think "WOW, THANK YOU". And it isn't even my truck (nor is any of it applicable, as mine won't have points, OR a distributor)!

    You are an asset to this forum.

    Thank YOU!
     
  19. Bill Hanlon

    Bill Hanlon Member

    Joined:
    Jun 4, 2002
    Messages:
    2,729
    Location:
    Fredericksburg TX
    Piture of Ziggy's Christmas present

    [​IMG]
     
  20. Zig

    Zig Member

    Joined:
    Oct 14, 2006
    Messages:
    4,860
    Location:
    Pittsburg KS
    That's what I'm talking about, Mike!

    I can't thank Bill enough for going so far out of his way to help me solve the mystery of the missing 228!!! Well, it's not missing, it's still in the truck, but~ well, you know.
    The thing I kept saying was, "Well these engines don't have all that computer crap on them, so they really are as basic as it gets."
    Right~
     

Share This Page