• We have upgraded our forum software! See here for details.

Rear tank/swaybar

I`m not a welder by trade, not even good at it, but mine have held, not pretty mind you, that is why we have grinders, once the bed is on cut the hole for the filler in the left rear corner next to the stake pocket, build a box from 6061 alum diamond plate that will lock, large enough for a bottle jack and wrench as well. Second pic are the rebuilt bed sill plates top sill done, bottom was being done at pic time.
 

Attachments

  • DSCF0337.jpg
    DSCF0337.jpg
    129.1 KB · Views: 595
  • DSCF0335.jpg
    DSCF0335.jpg
    117.1 KB · Views: 624
Last edited:
I'm using a filler from a Geo prism, cap and all, I just shortened the height of it, the vent runs almost to the top with a relief baffle built in, I still have to drill a vent hole in the cap through the side.
 
Pics of filler and vent baffle, also will need to change the fuel line some what I`m too close to the panhard bar, I`ll have to put a 90 at the tank move the line over about two inches before my verticle run to the inside frame rail.
Holy crap another redo....:eek:
 

Attachments

  • DSCF0339.jpg
    DSCF0339.jpg
    120.3 KB · Views: 598
  • DSCF0340.jpg
    DSCF0340.jpg
    108.4 KB · Views: 620
  • DSCF0338.jpg
    DSCF0338.jpg
    117.6 KB · Views: 599
Well just got a few things left to do, build the box from T6061 T-6 alum to match the bed, and remove the old tank/fill hole...then I can start on cab stuff.
 

Attachments

  • DSCF0343.jpg
    DSCF0343.jpg
    101.2 KB · Views: 575
One pic from the rear, you cannot see the tank at 10/15 foot back at 12 inches off the ground...so far I'm pleased with the outcome.
 

Attachments

  • image.jpg
    image.jpg
    165.2 KB · Views: 574
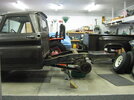
Just thought I would share this info for those that needed this...concerning shocks.......


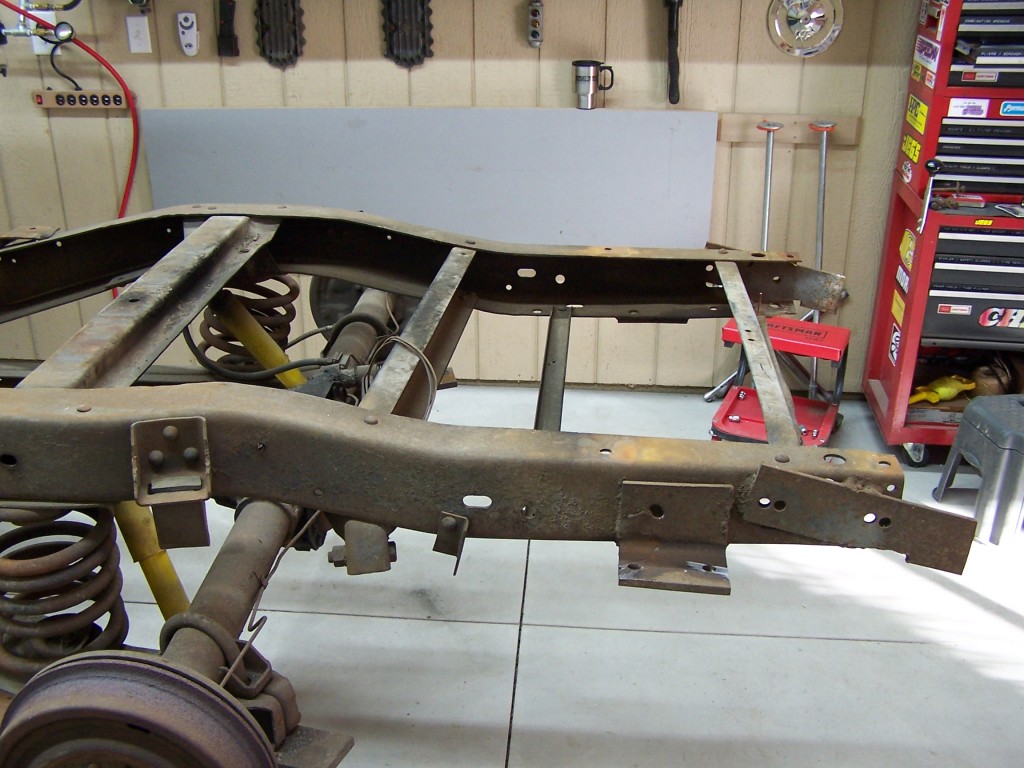
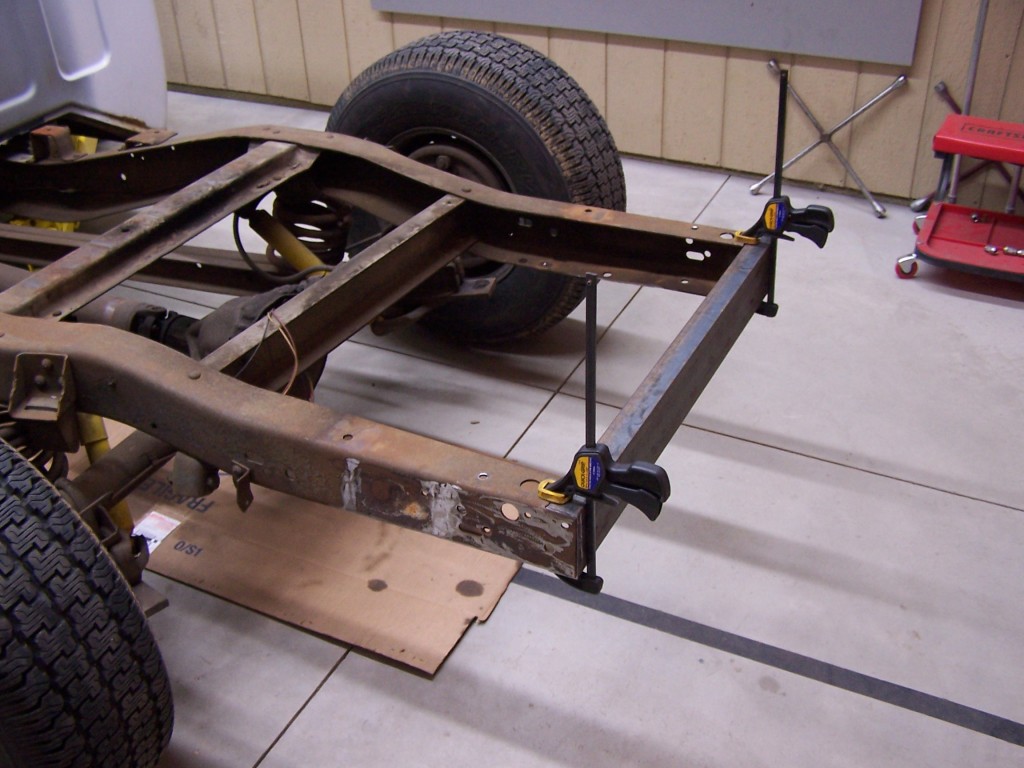
Thanks BOH......, been searching after I bought, Oh well...here`s some more surprising facts....although we knew that angle would lessen the damping effect, I just didnot think it would impact it that much...I may just relocate them altogether on down the road. Our shocks down to about 30 degrees but I will have to get the protractor level out to check.... I`m now considering moving them to the out side of the frame and flipping the lowers ( switch from side to side ) so they exit the rear and run up to the frame outside.... I think It would offer more part numbers and not nessarily more expensive shock as you would have more dampening effect with a cheaper shock. thoughts...? Update Just got thru checking mine are at 40 degees, actually closer to 42 degees as the suspension compresses its even more...man that is ugly....! Don`t think GM planned that out very well..

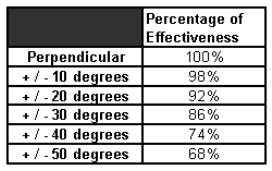
Angle of the Dangle...... this thru KYB 4x4 review site

Mounting shocks at angles reduces the overall dampening effect of the shock. Reason being; the shock’s mechanisms will travel geometrically, less of a distance than that of the suspension system. Some vehicles (early model Land Cruisers, etc.) have their rear shocks mounted at about a 30-degree inward (inward = leaning toward the differential, not forward or aft-ward) angle, while others have their shocks mounted at a 20 degree angle or so forward and/or aft ward of the rear axle (e.g. Chevy, Jeep CJ’s, etc.). There are several reasons why this might be done. First, available space… regardless, if this is something you are going to do yourself, you’ll need to increase the static pressure of shock to mimic the shocks effectiveness of it being in a perpendicular location. Secondly, you can gain more suspension articulation than would normally be limited by the overall travel of the shock absorber if it were located perpendicular to that of mounting your shocks at an angle, if you don’t have room for a taller shock absorber. The charts here show the overall estimated reduced effectiveness of a raked shock absorber. However, these numbers should only be used as a rule of thumb as other factors such as the arc of the suspension cycle can factor in.

shock-genius-1.gif


Sinse I ordered my shocks and changed my mind as I was ordering went with the same shocks as lakeroadster monroe pn 32207 with relocators, but later one after the bed is back on I will look at moving shocks to the out side of the frame rail...

Great info, thanks!!
 
Started cleaning up some parts, using cheap white vinegar, took four days to clean off 50 years of rust, cost 1.93, and no elbo grease, just let it soak, not sure if it would remove grease...
 

Attachments

  • DSCF0392.jpg
    DSCF0392.jpg
    189.3 KB · Views: 559
  • DSCF0391.jpg
    DSCF0391.jpg
    188.4 KB · Views: 557
Thats some clean steel frame

Rich,
That frame looks very clean! the work some of you guys do is amazing.
 
Thanks Steve, this is kinda like a second time around, originally did this truck 22 years ago, the milage/abuse shows.. :) ..LOL
 
Sway bar picked up at a thrift store....LOL, 10 bucks out the door, new, never been used, just had to buy links and build mounts for it.
 
Thanks Rich for all the useful info & pics. I`m not that far yet. I got my tank mocked up & got new axles ordered from Moser`s today. Getting ready to order the same "4 HD lowering rear springs you & lakeroadster used & probably an adjustable trac bar. Now researching the front disc conversions 5x4-3/4 bolt pattern. If it ever gets above 5 degrees here in Michigan, I`ll be able to blast & paint the frame!
 

Attachments

  • `65 chevy truck restoration 008.jpg
    `65 chevy truck restoration 008.jpg
    98 KB · Views: 579
  • `65 chevy truck restoration 009.jpg
    `65 chevy truck restoration 009.jpg
    130.7 KB · Views: 520
  • `65 chevy truck restoration 010.jpg
    `65 chevy truck restoration 010.jpg
    116.7 KB · Views: 659
  • `65 chevy truck restoration 011.jpg
    `65 chevy truck restoration 011.jpg
    93 KB · Views: 509
Back to the bed on my truck, decided to revisit the rear bed sill issue, after much research fiquired out that the bed is from a 60 to 62, due to the spacing of the rear bed sill bolt locations and evidently John ( Lakeroadster ) has the same, whoda thunk we both had differant beds,....but what I don`t understand is why John`s bracket does not reach the frame...here`s a pic from Allen`s truck and sense I had drilled out all 9 spot welds, moved the brackets in and plugg welded them in they sit right on the holes in the frame, This was done about a week and a half ago, now the new issue is this new mod had impacted the level of the bed, one of two options, buildin spacers for the rest of bed mounts or cut down the rear bed sills by 5/8 of an inch.....ARRRGGGG....LOL, gotta love doing this.....!
 

Attachments

  • 100_7540.jpg
    100_7540.jpg
    420.8 KB · Views: 533
  • 2011-11-25 005.jpg
    2011-11-25 005.jpg
    53.3 KB · Views: 533
Back to the bed on my truck, decided to revisit the rear bed sill issue, after much research fiquired out that the bed is from a 60 to 62, due to the spacing of the rear bed sill bolt locations and evidently John ( Lakeroadster ) has the same, whoda thunk we both had differant beds,....but what I don`t understand is why John`s bracket does not reach the frame...

I cut the end of the frame off... had to in order to make room for the license plate bracket on the roll pan. Why, there should be lot's of room... well I installed the roll pan between the rear stepside fenders and not hanging off the back of the bed.

And the bed on my truck... it's from a 67-72. One of the first things I ever did to the truck was remove the 67-72 fenders and steps and replaced them with the correct 55-65 style fenders.

As for using spacers between the bed cross sills and the frame, I used wooden spacers on my truck to raise bed steps level with the bottom of the cab. But since you have a fleetside that's not an option... it will throw off the body lines of the cab vs. the bed.

Wrong bed
65C10FrontAug2008-AsPurchased-.jpg


Cutting the frame
100_6900.jpg


100_6906.jpg


2010_12010007-1.jpg


Bed Spacers
DSCF1578.jpg


This is a photo of the rear bed support, it is not stock. I fabricated this mount during the rear frame changes when I did the frame mount gas tank. Close quarters back here due to the location of the modified roll pan.
DSCF1571.jpg
 
Last edited:
Back
Top